It seems whenever I'm out working in the garden, I haven't got everything with me that I need. What I should really have is a proper gardening apron - and hey - I can sew - so why don't I make my own!
I spent some time on the Internet looking at gardening aprons to come up with something that would work for me. I wanted an apron that wasn't too long so that it drooped in the way when I was bending down. It had to have a number of pockets at the bottom and a pocket in the bib - oh, yes - I wanted a bib apron. It needed to be relatively simple and should be made with fabrics and items I already hand on hand. And this is what I came up with!
This apron has 4 pockets at the bottom - 6 if you count narrow pockets you could slide a pencil into! There's a wide pocket in the bib which would be good for holding seed packets. It has waist ties and an adjustable neck strap that knots to just the right length through a grommet. I have heavy bottom-weight woven fabric on hand and I figured I wouldn't need much more than a metre. So let's get started!
I planned out my pieces and cut them from a tan denim-like fabric that I had sitting on the shelf. The apron body is cut on the fold - everything else will fit in wherever it can on my fabric. I can even fit in a 12" square in to make my own bias tape.
So what else do you need? A 25 mm bias tape maker will make the 1/2" tape I need plus a grommet to run the neck tie through. Or you can buy a package of wide bias tape. My sewing machine and serger will be put into use, although you could do the whole thing with just a sewing machine. And of course, a steam iron.
Let's get started!
I cut out all the pieces I needed from my heavy fabric.
The body of the apron came from a 22x10.5 piece cut on the fold. In pencil, I drew the cutout, starting at 5" from the centre at the top and curving down to 12" from the bottom at the side. I cut it out with my rotary blade.
The rest of the pieces I fitted in from what remained of the fabric.
Bias Binding
Make the bias binding from the 12" square - and here's a link to a blog post I did on how to make your own bias binding. This will be used to bind the raw bib edges and the remainder will be the neck strap.
For a 25mm bias tape maker, cut the strips 2" wide or buy a package of wide double fold bias tape.
Bib Pocket
Serge/finish the raw top edge.
Fold over 1" to the right side and stitch the sides down. Clip the corners.
Turn the pocket right side out. Fold the sides and bottom over 3/8" and press down. If you want to learn how to get crisp bottom corners, I have a link for that, too!
Topstitch the top edge.
Bottom Pocket
Serge/finish the raw top edge.
Fold over 1" to the back and stitch down.
Press the seam towards the apron. This makes it easier to flip the pocket to the right side without the seam at the bottom showing.
Now turn the bottom pocket up onto the front of the apron and press.
Decide where you want your dividers and draw the lines with tailor's chalk or a washable sewing marker and pin the lines in place. Stitch the divider lines, remembering to back-stitch at the beginning and end of each line. Pin the pockets at the sides for now.
Bias Tape for the Bib Sides
Open one side of the bias tape and pin the right side of the tape to the wrong side of the apron bib.
Stitch on the fold crease.
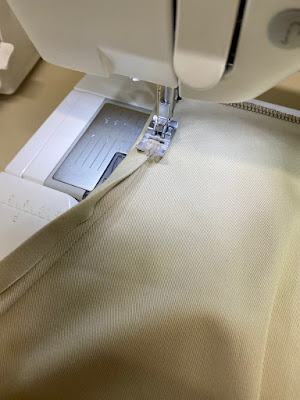
Now flip the binding to the right side of the apron and stitch close to the edge.
Serge/finish the raw edges at the top and sides. Turn the bib top and sides to the back 1", press and stitch down. Attach the bib pocket - I sewed mine in place 2" from the top of the apron.
Ties
Fold the ties in half lengthwise and serge/stitch 1/4" seam down the sides and across one end. Turn right side out and press.
Fold the raw edge of each tie under 3/4" and pin on the back at the top of the sides - stitch down.
Stitch the remaining bias tape down one side through the entire length.
Attach one end to a top corner of the bib at the back.
Apply the grommet to the other corner. Thread the neck strap through the grommet. Try on the apron and tie a knot in the neck strap so the apron sits at the right height for you.
And that's it! You now have a gardening apron - probably made from a piece of heavy woven fabric that was too small to make anything else with!


