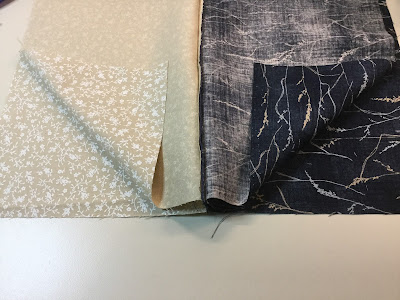
I'm pretty bad at throwing away scraps of fabric when I've finished a garment - I'm always sure that there's something I can make them into. I recently started taking part in a summer market on our little island and quickly discovered that buyers were tempted by little things. I thought that lined zipper pouches might be just the ticket! This is a very quick project - perhaps 15 minutes to half an hour total. Click on the pictures to see details more closely.
And with shelves of pretty fabric pieces plus zippers purchased at our local thrift store, I had all the ingredients.
I started by cutting 2 pieces of outer fabric and 2 pieces of lining to 9"x7" rectangles. You can cut your pieces however big or small you like, just make sure that the lining and outer pieces are the same size. Use a plastic-toothed zipper - no metal, please! You want a zipper longer than the 9" width of your bag pieces.
I placed one of the rectangles of outer fabric in the middle of the long plastic-toothed zipper with the right side of the fabric against the right side of the zipper. It's pinned in the picture but I stitched without pinning. You can definitely pin these together if you are more comfortable with that.
With the zipper foot on my sewing machine, I stitched next to the zipper teeth with the fabric on top and the zipper on the bottom. Now flip the front piece back and put the other outer piece in place - right side of the fabric against the right side of the zipper, making sure that it matches the first piece and stitch in place. I have the piece folded back in the picture to show how the right sides go together.
Now it's time for the lining. Fold the outer pieces down so the wrong side of the zipper is exposed and place the right side of the lining against the wrong side of the zipper, matching it up with the outer pieces.
Stitch along the line of previous stitching.
Do the same with the other lining piece. Now we're ready to topstitch.
Move lining and outer pieces to each side of the zipper. The zipper should be in the middle with no fabric behind it.
With the zipper foot still on the sewing machine, topstitch close to the edge with a slightly longer stitch length so that the topstitching shows.
Pull the zipper tab into the middle of the bag and trim off the ends. Ask me how I know to pull the zipper back first! Now it's time to finish stitching the bag together.
Put the right sides of the outer and the right sides of the lining together. Make sure the zipper is pulled back into the centre so that you'll be able to reach through and pull the bag right side out when you're finished stitching.
With the zipper folded back to the lining side, match the topstitched seams and pin in place.
Put the regular foot back on your sewing machine. Start stitching on the lining bottom. I leave a 5/8" seam allowance along the bottom of the lining and 1/2" seam allowance everywhere else. Stitch slowly and carefully through the zipper - you can manually wheel through this part. Do not stitch across the bottom of the lining. You will need this opening to pull the bag right side out.
Clip across the corners, being careful not to cut through the stitching and trim back the seams.
Now reach into the opening and pull the bag right side out.
At this point, I use a pencil to poke out the corners of the outer bag.
I stitch the bag opening just along the edge. You can do this by hand, but as it's hidden inside the bag, choosing a matching thread seemed enough to me!
Stuff the lining back inside the bag and pull the zipper closed. That's all there is to it!
Such a quick, easy project - over the last couple of days, I've made ten to sell on my stall with pieces cut out for more - wish me luck!


No comments:
Post a Comment