Thursday, 26 October 2017

Hazelwood Hoodie with a Panel


Pattern - Love Notions' Hazelwood Hoodie
Skill Level - Confident Beginner
Fabric - l'oiseau fabrics - Enchanted Forest digital panel
Skills - pattern hacking, gathering, pattern placement

Every now and then an amazing panel comes along and anyone who knows me will tell you I just can't resist panels!  l'oiseau fabrics brought in 4 incredible digital panels from Stenzo Textiles in the Netherlands.  After checking them out, my grandchildren got to pick their favourites and my granddaughter picked Enchanted Forest.  Click on any of the pictures to see them in more detail.
I knew I needed a pattern with enough width to show off all the detail of the panel and the Hazelwood Hoodie with its gathering in front and back promised to fulfill the need.  First I would need to test it as I hadn't made this pattern before.  The Hazelwood Hoodie has a high/low hem and I would need an even hem for the panel.  This was an easy task - I taped paper to the bottom of the front piece and transferred the hem from the back to it so front and back hems were identical.
The pattern is quick and easy.  In to time at all, I had a hooded tunic top that my granddaughter loves!
Now for the main event!  I taped more paper to the front and back pieces and added 5" to the front of the tunic and then traced that hem on the back.  Easy peasy!
The hard part in this whole exercise was making the most of the amazing panel.
There are so many wonderful pieces to this panel, that it was hard to choose, but I finally made my choices.  And I was still left with a number of scraps big enough to use for something else!
Once again, sewing went quickly.  The actual sewing time was probably no more than an hour or two.  I especially love the back.  The Hazelwood Hoodie has a back yoke and I was able to use a scrap that fit in perfectly!
The Hazelwood Hoodie is a Love Notions pattern that has been around for a while and definitely needs more attention.  It's sized from 2T to 14 and my granddaughter loves it both in tunic and dress length.  It's easy and quick to sew, giving impressive results.  You can click on my affiliate link below to get the pattern yourself if you don't already have it!  This is a pattern well worth having in your collection.

Love Notions Hazelwood Hoodie


Thursday, 12 October 2017

Sewing Tools Part 1 - Measuring

A dear friend suggested that I do some posts on sewing tools.  It struck me as an excellent idea!  Some of these little gadgets I'd be totally lost without and others I use infrequently, but am grateful for them when that time arises.  So let's start with measuring tools.

Cloth Tape Measure

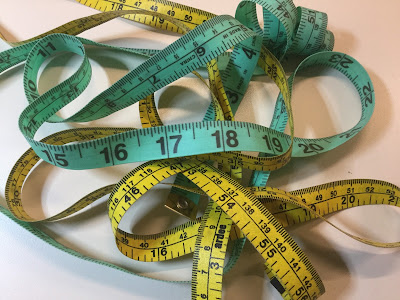
Now this one is absolutely vital!  If you're planning on sewing clothes, you need accurate measurements!  Since I also do pattern testing, I even take my measurements before the beginning of each test.  It's a little disheartening - but definitely necessary!  These days, tailoring tape measures are generally made of a fibreglass material which resists stretching.  Just out of curiosity, I tested my tapes against a hard aluminum ruler and my cutting mat and was surprised to find that over 36", they were out!  One was 1/4" short and the other was 1/4" long! This probably wouldn't make much difference in a waist or bust measurement, but if you're gauging accuracy in a 1" square on a .pdf pattern, it would probably be better to use an inflexible measurement tool.

Rulers

There are times when you really need a straight edge and hard rulers are what you reach for.  The one I use most frequently is a quilting ruler 6" wide and 24" long.  Perfect for cutting cuffs and neckbands!  It also does double duty as a pattern weight on my cutting mat.  I have it secured to the bulletin board above my sewing counter within easy reach - a necessity as I use it every day.  A 6" plastic ruler and 36" aluminum ruler complete my collection.  Sometimes you need just a little ruler with both metric and imperial measurements and the 6" ruler fills that need.  If I need to cut bands longer than 24", or accurately cut a straight edge to a wide piece of fabric, the 36" ruler is invaluable. These last two items aren't used in my sewing room very often, but there are times when nothing else will do.

Seam Gauge and Hemming Gauge

The seam gauge is another tool I use constantly.  I use it for everything from marking hems to gauging the distance from stitching lines on my machines.  This tool is a definite necessity in my sewing room!  When I was searching out measuring tools for this post, I stumbled upon my old hemming gauge which I haven't been using, but checking out the various markings on it, I can see I should try it again - especially for those curved hems.  It has curved hem markings from 1/4" all the way up to 2 1/2" and can be used with an iron because it's made of aluminum.

Cutting Mat

My final measurement tool is my cutting mat and this one is a definite necessity!  Nearly all of my pattern cutting these days is done on a self-healing cutting mat with a rotary cutter.  So much easier and gentler on these aging hands!  I have 3 cutting mats - a small one by the sewing machine and 2 big 24"x36" ones for my cutting table.  The small one gets used for everything from cutting a quick cuff to providing a hard surface on my ironing board so that I can pin something in place.  The big cutting mats I simply couldn't sew without these days and their clear markings make sure that my straight edges are accurate.

Now there are definitely lots more specialized measuring tools, but these are the ones I find most handy.  In future posts, I'll explore tools for cutting, pressing and those accessories that defy categorization.  Stay tuned!