Showing posts with label Prisma. Show all posts

Friday, 12 February 2021

Prisma becomes Rosie!


Pattern - Love Notions Prisma for girls
Skill Level - Confident Beginner
Fabric - cotton/spandex from l'oiseau fabrics
Skills - colour blocking, stripe matching


My friend's granddaughter is a voracious reader (actually "listener"!) and has an amazing imagination - you never know who she actually is from day to day.  Her mother told me that she's enjoying the series about Rosie Revere the Engineer and asked if I could make her a Rosie dress for her upcoming birthday.


As I was not familiar with that reading series, her mother sent me a picture and right away I could see that Love Notions' Prisma would be absolutely perfect!  And since mother was taking care of the head scarf, all I needed was white, black and red knit fabric.

Rosie's dress is very plain with black trim at the neck and sleeves but with alternate black and red stripes at the bottom of the dress.  Now that part would need planning!


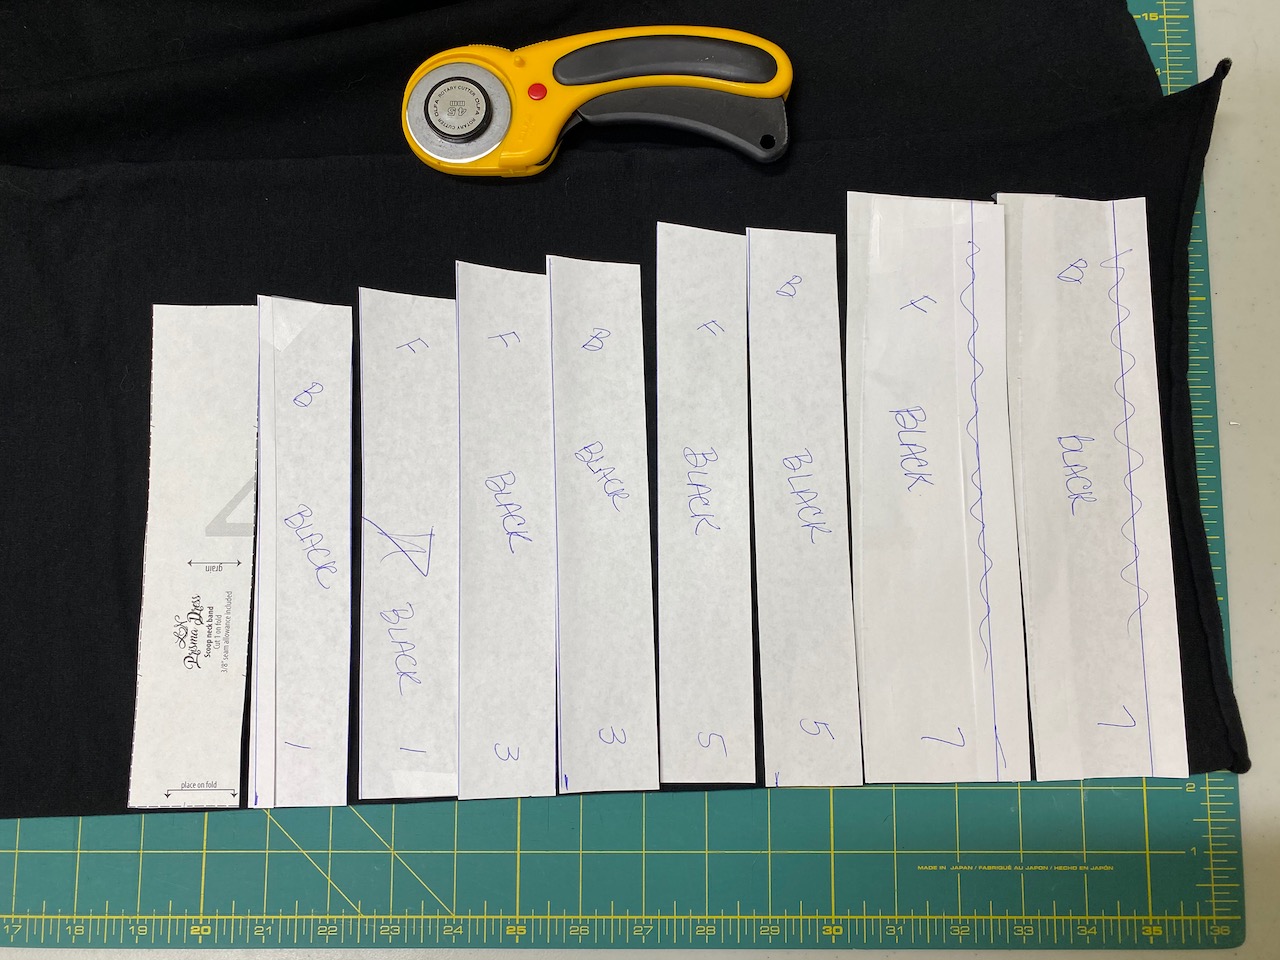
I decided on 1" stripes joined with .25" seams so each stripe would be 1.5" wide.  The bottom black stripe would be 2" wide to account for the hem.  And then I would have to add 1.5" to the body above the stripes to account for the loss that the seams cause.  I taped the pattern pieces to my cutting mat and drew lines for the stripes, then cut for the addition to the body.  I was careful to write the colour on each stripe.


I also marked the stripes with numbers and F and B for front and back.  The Prisma version I was sewing is the A-line view, so all of the stripes would be different lengths and the outsides would have a slight slant to them.  I also made the hem straight instead of the slight curve to simplify things.


Then I placed all the pattern pieces with their fabrics.


Time to cut everything out.  The stripes were easy to cut - one at a time, starting with the largest and using the straight side of the previous cut for the next one.


Once everything was cut out, I placed all the pieces in their respective task.


I started with the stripes, going from bottom up and now you can see why numbers were important!  I serged the stripes together with a .25" seam.  And as I serged on each stripe, I steam pressed the seam down.


It's easy to get confused when sewing the stripes together (ask me how I know!) so here's a tip.  You are sewing the long side of the shorter strip to the short side of the longer strip.  When you do that, you should see a triangle of the stripe on the under side.


With all the stripes serged together, then they were serged to the body.  Now it was time to assemble the dress.


Front sewn to back and sleeves in place, the side seam needs to be sewn.  This is the tricky part!  I carefully pinned front to back and then with a longer stitch, sewed the striped section together with my sewing machine to make sure the stripes stayed put.

I did the rest of the assembly with my serger, but when I got to the striped section, I made sure the serging line was just outside of the straight stitching line.


A steam press and we're ready for the final bits - neckband, bands for the ends of the short sleeves and hemming.


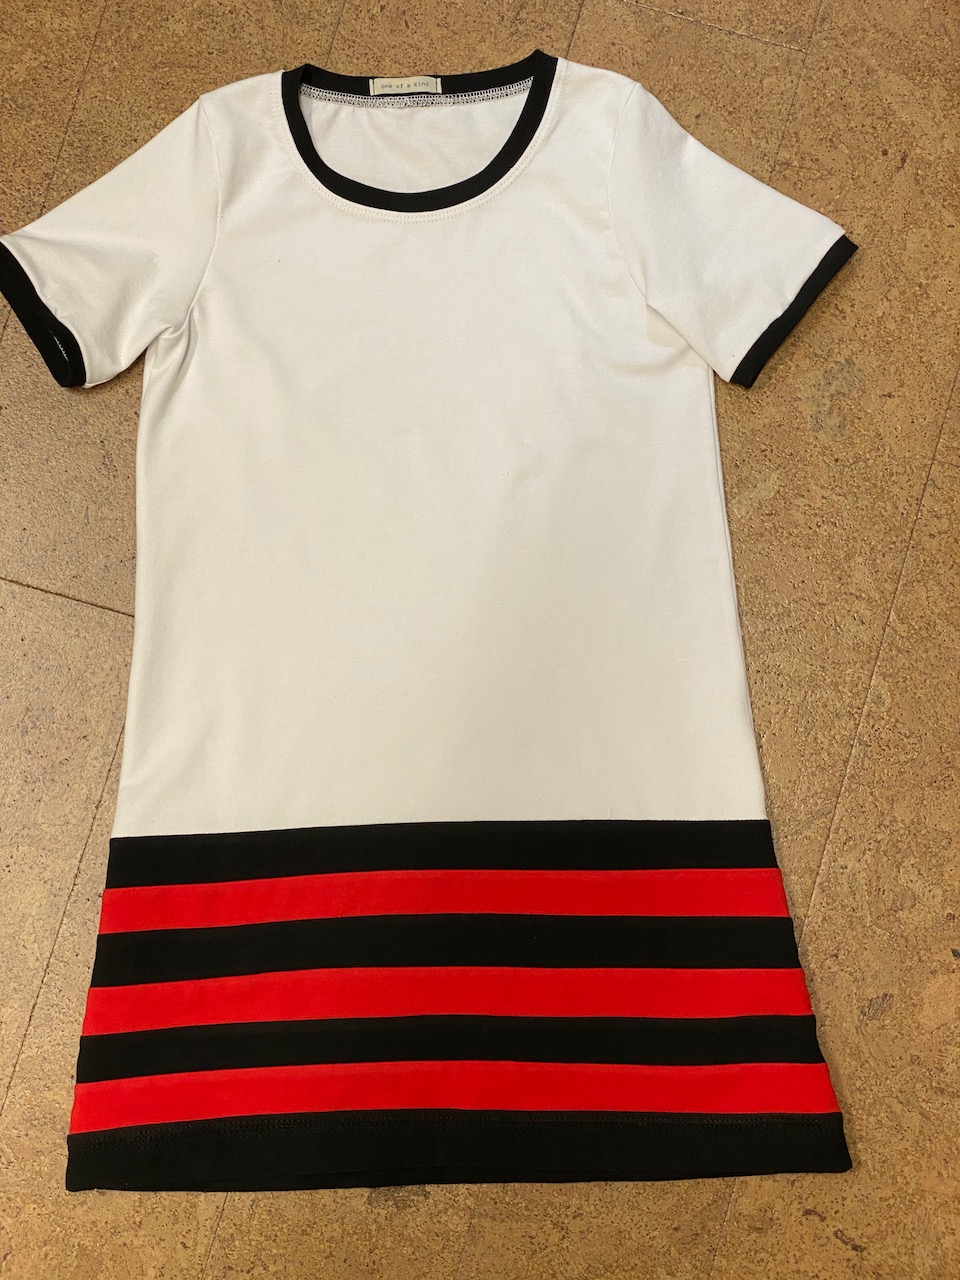
I'm pretty pleased with how well it turned out and I hope "Rosie" likes it too!  Since it's a birthday present, I don't have a modelled photo, but if I get one, I'll update this post.


One final touch - a label which I purchased from Love Notions - which seemed totally appropriate!

If you don't already have this wonderful pattern for girls, you can get it from my affiliate link below.

Love Notions Prisma Dress sizes 2T to 16


Sunday, 31 December 2017

Panels and Borders and Patterns - oh my!


Patterns - multiple Love Notions patterns - links at the bottom of the page
Fabric - l'oiseau fabrics
Skills - working with panels and borders

It will come as a surprise to no one who knows me that I'm a little obsessed with panel and border fabrics!  This is probably an extension of my love of all kinds of puzzles, and hence my "handle" of puzzlnut!  I love a challenge and getting the most out of a beautiful panel or border is an exciting one.

Love Notions has lots of patterns that are tailor made for panels - and l'oiseau fabrics has the panels and border prints to perfectly complement them.  Let's looks at a few patterns first and then we'll talk about making the most of those panels.

Some panels are small enough to get a perfect little shirt and the L'il LDT in size 5 is wonderful for displaying all of the components that this zebra panel had and still leave large scraps for other projects.
Sometimes a panel must be pieced so you can get the whole project out of one panel.  This amazing bear and rabbit panel was picked by my grandson to make him a hoodie.  This particular panel was big - as in about 60" x a yard and a quarter!
The Vanguard Kit has options for colour blocking that allowed me to get a size 7 hoodie by taking advantage of the sleeve options.  I was even able to squeeze lining for the hood from the panel! I'm told it's my grandson's favourite shirt!
You can even make alterations to a pattern to get the most out of your panel.  I extended the Hazelwood Hoodie to a dress length to get the most out of the panel my granddaughter picked out.  Don't be fooled by her serious expression - she loves the hooded dress!

The picture at the top of the page is a beautiful border print which is no longer carried.  The Terra Tunic, with the mini alteration of making the front and back pieces the same length, worked perfectly to display the panel and give me a unique garment that always gets me compliments.
I used the Terra Tunic recently to make a shirt for my daughter who loves fantasy fiction.  I did cheat a bit as I had scraps left from making a shirt for an order which allowed me to get 3/4 sleeves.  I could have gotten short sleeves without it and still make the XXL shirt from the Terra Tunic pattern.
Here's the front.
And the back.
And then there's the La Bella Donna - with a few alterations it was perfect for this border print.  I evened the hem and put in a scoop neck - just because I like a scoop neck.  I also cut the sleeve cuffs from the border print.  This shirt is definitely one of my favourites to wear!

If there's not quite enough fabric to complete the garment, you have to find something that will echo colours in the panel  I used the Rockford Raglan to make this shirt for my daughter-in-law.
My original thought was red sleeves and neckband to echo the red in the umbrella, but my daughter-in-law preferred grey and I must say I agree with her choice as it doesn't detract from the panel.
Another pattern that is perfect for border prints and panels is the Prisma and it's what I used for this size 10 dress for a customer.  I'll use it to demonstrate how to get the most out of your panel.
The Prisma was perfect for this particular panel as it allowed me to get the front and back of the dress from the long tree/donkey pieces.
The first thing you need to do is to find the visual centre of the piece you're going to cut.
For me, the visual centre was right at the edge of the donkey's hat.
Now fold the fabric evenly along that line and see if your pattern piece will fit.
And the narrow a-line profile of the Prisma fit perfectly!

I've shown you a few patterns and how they worked with panels and I list them below, but there are more  You can click on any of my affiliate links below to get these patterns if you don't already have them.  And if you're looking for amazing panels, check out l'oiseau fabrics as they have a wonderful selection! A great pattern paired with a great panel, add a little imagination and you've got a unique one-of-a-kind garment.  Give it a try!

Love Notions Terra Tunic
Love Notions Rockford Raglan for Ladies
Love Notions La Bella Donna Top & Tunic
Love Notions Vanguard Kit
Love Notions L'il LDT for Girls
Love Notions Prisma Dress
Love Notions Hazelwood Hoodie