Showing posts with label pockets. Show all posts

Tuesday, 1 December 2020

Compose Robe


Pattern - Love Notions Compose Robe
Skill Level - Confident Beginner
Fabric - Bamboo Fleece from Discovery Fabrics
Skills - pocket corners

I've been wanting a good robe pattern for a while and Love Notions has come out with a great robe pattern!  It can be knee or calf length and you have the choice of a hood or a banded edge.   Of course, the pattern for women comes with the full bust option.  Not only that - you can make the Compose Robe in knit or woven fabric!  How versatile is that?  And wait - there's a children's pattern, too!

I chose to make my calf-length robe using luscious peacock green bamboo fleece from Discovery Fabrics. The fleece is light, yet warm and oh, so cosy!  The face is smooth with a fuzzy inside.  I'll be making hooded robes for my grandchildren in this fabric, too!

There are lots of the perfect little features we've come to expect from Love Notions patterns. 
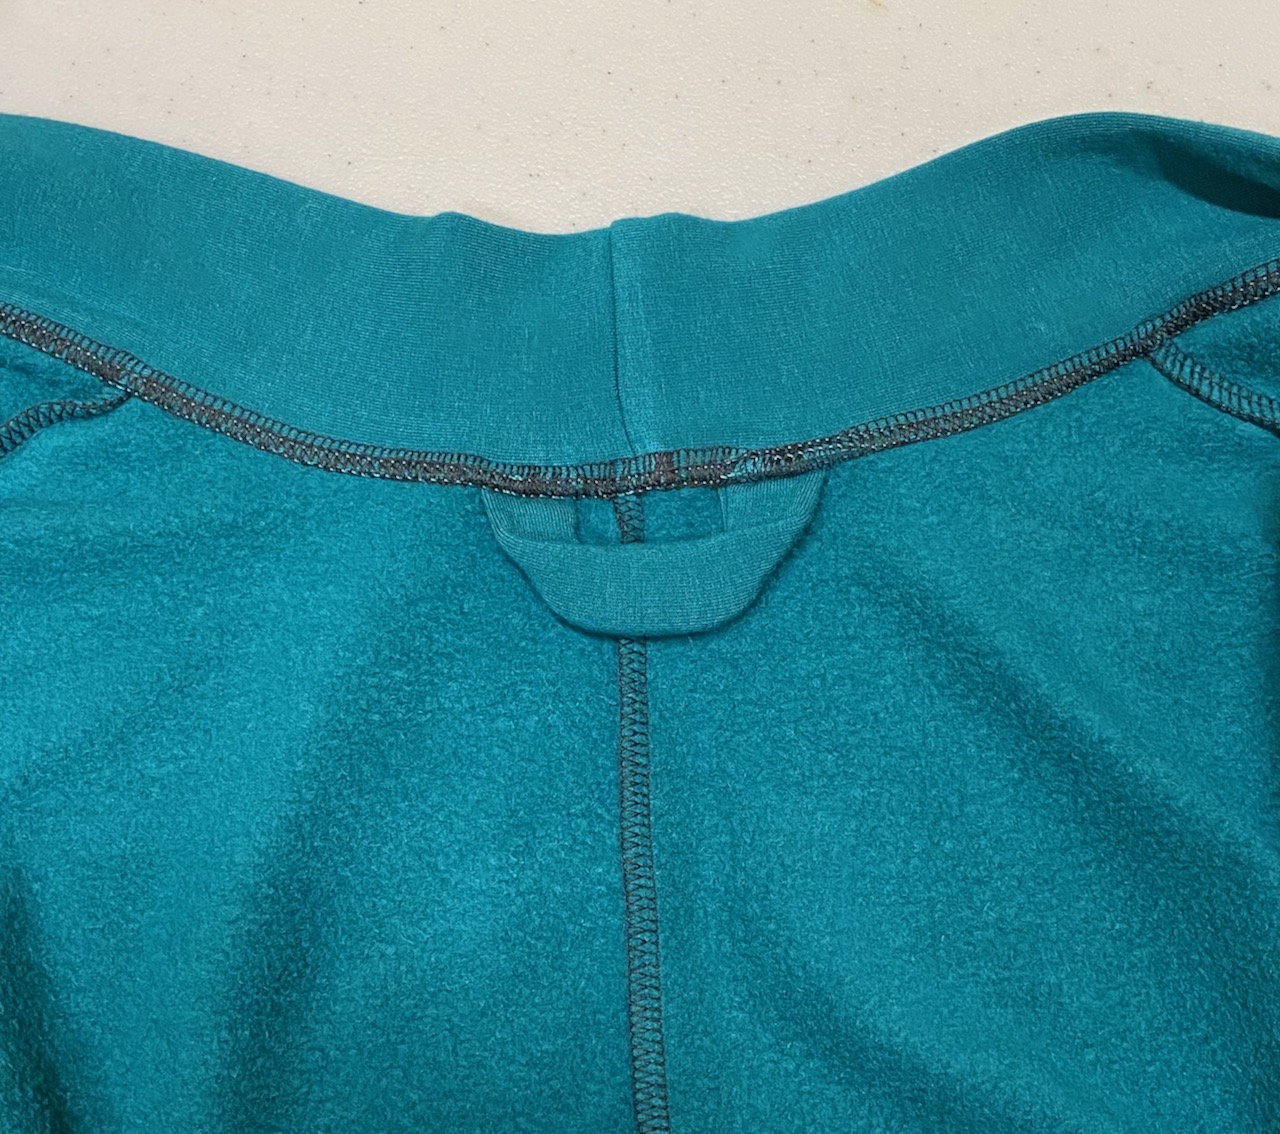

There's a loop for hanging up your robe built into the neckline.


The band around the robe ends in a nice clean finish.


Loops at the waist hold the lovely, long belt above the pockets which are perfectly placed.  We need pockets, right?

Perfect Pocket Corners

And speaking of pockets, I like to see nice crisp corners on my pockets, so I've developed a process to get what I need.


After you've created the hem at the top of the pocket, press the edges in 3/8".


Now open the bottom corners and fold them in to create a diamond shape, the edges of which stay inside the pocket edges.


Steam press it flat.
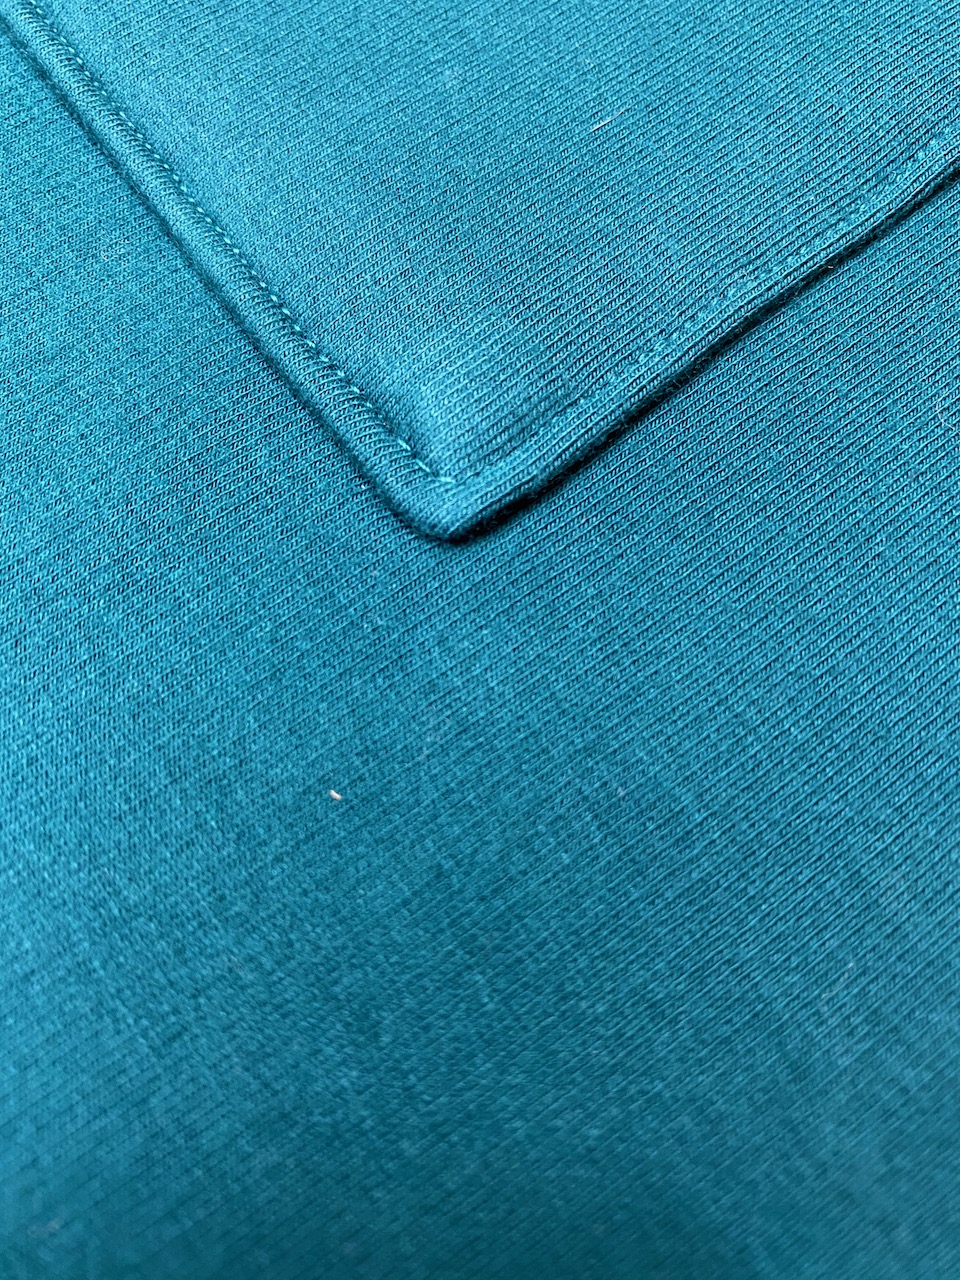

And once you've stitched your pocket in place (remember to use lots of pins!) you won't see any edges peeking out at all!  Pocket perfection!

Adding Ties

Want to make sure your robe stays closed?  You can add ties and do it discretely so that they don't show.

First, put on the robe to establish where you want to add the ties - you'll want 2 sets - one near the outer edge and another at the inside edge.  I marked mine with safety pins, then put the robe on to make sure any outside stitching marks were hidden by the belt.

Then I replaced the safety pins with chalk marks for where the ties would be attached.

Next - what to use for ties.  I had an old roll of seam binding inherited from my mother-in-law's stash.  How old?  Well, you can see it's marked with 15 cents!  I cut what remained on the roll in 4, giving me ties about 8" long.  A bit longer would have been better, but I used what I had.  I cut a forked tongue in one end to prevent fraying and folded over the other end which would be stitched to the robe.  You can use a fine ribbon - or anything that's not going to be too bulky. 
I pinned the ties in place and then stitched them down.  If your robe's material is fine, you might want to reinforce under the ties.


 Now I can wear my robe with confidence knowing that it's not going to accidentally come open!

Love Notions' newest pattern, the Compose Robe is the pattern I've been waiting for.  It's comfortable, can be made in knit or woven fabric and has the clever features I've come to expect from well-made Love Notions patterns.  Available in women's and children's sizes, it's a pattern that belongs in all pattern libraries.  You can get the patterns from my affiliate links below.

Love Notions Compose Robe for Women - sizes XS - 5XL

Love Notions Compose Robe for Children - sizes 2T - 16


Tuesday, 28 January 2020

From Boyfriend Cardigan to Housecoat!

Pattern - Love Notions Boyfriend Cardigan
Skill Level - Confident Beginner
Fabric - French Terry from l'oiseau fabrics
Skills - zipper installation

I desperately needed a new dressing gown/housecoat!  I thought really hard about using the Octave Coat - and let's face it - that would be amazing!  But I didn't want a wrap gown with the tie belt or buttons.  I wanted something that zipped up the front.  Finally I decided that the Boyfriend Cardigan could work.

My plan was to lengthen it and sandwich the zipper in the shawl collar pieces.  I would also size up to make sure that it was roomy.

I had a length of lovely French Terry from l'oiseau fabrics that I'd been hoarding.  The 2.5 metres should be enough for the body and 3/4 sleeves I was wanting.  The collar would have to come from a solid and I had black French Terry which would also do for the pockets.

I extended the front, back and shawl collar pieces 14" by just adding onto the bottom and removed the vent extensions.  I added 3/8" for a seam allowance to the outer edge of the shawl collar as I wasn't going to be cutting it on the fold.

I followed the tutorial instructions until I got to attaching the shawl collar.  It was time to get ready for the zipper installation.
I stitched the shawl collar pieces together at the back to create two separate collar pieces.  I pinned one collar section to the body - right sides together.
Now it was time to start thinking about the zipper and how high up to place it.  Since the gown was nearly complete, I was able to put it on and hold up the zipper and mark it on the collar pieces.  As 30" was the longest separating zipper I could find, I knew it wouldn't go all the way down, but I needed it fairly high up the front.
Next I placed the gown on my cutting table front facing up with the halves separated and the bottoms even with one another.  The shawl collar was brought to the centre so it was facing right side out.
Then I applied double-sided tape on the edges to keep the zipper tape in place.
I laid the zipper halves on top of the double-sided tape with the teeth facing away from the edge.  Then I laid the other shawl collar piece on top, matching at the back centre and bottom ends, then pinning in between.  Time to take it to my sewing machine.  And a big tip!
I know that with the under piece of the collar stabilized by the double-sided tape and zipper, that the top layer could stretch and shift, so I employed a little trickery!  I had a piece of card stock which I placed right beside the needle and stitched right at the edge of the card stock.  This prevents the top layer from stretching and moving.  As I reached the end of the card stock I kept the needle down, lifted the foot and moved the card stock along - until I reached the end of the zipper.  It works like a charm!
Now for the finishing steps.  With right sides together, I stitched across the ends of the shawl collar pieces 1" from the bottom and trimmed the corners.  I turned the corners inside out, then pinned up the bottom hem 1" and pressed.
Then, to secure the collar to the gown, I pinned the collar in place so that the raw edge covered the seam, which I had pressed towards the collar.  I pinned along the seam on the right side while my fingers felt to make sure that the raw edge was far enough over the gown body side to be caught by my machine.
Then finally I stitched all around the gown collar and then across the hem.  I used my coverstitch machine, but a sewing machine works equally as well.
And I'm delighted with how it's turned out!  I now have the zip up housecoat I've been thinking about for months!  If you don't already have the Boyfriend Cardigan, you can get it through my affiliate link below.

Love Notions Boyfriend Cardigan

Happy sewing!

Tuesday, 23 January 2018

Trendy Tunic for Girls - New Options!


Pattern - Love Notions Trendy Tunic for Girls
Skill Level - Confident Beginner
Fabric - l'oiseau fabrics
Skills - seam matching

When Tami from Love Notions announced that she was going to re-vist the Trendy Tunic for Girls to add more sizes and options, I was right onboard!  My daughter-in-law has told me it's one of her favourite tops for her daughter.  I definitely wanted to make more!
The Trendy Tunic is a shirt that has built-in fabric blocking and that means that you can use those precious scraps you've been loath to throw away.  It has pockets - yay for pockets!  There are options for short dolman sleeves and inset 3/4 and long sleeves.  The updated pattern now gives you a hood and a cowl.  Now isn't this just typical Love Notions - options galore!

The sewing itself is straight forward and as usual with Love Notions patterns, if there's anything at all tricky involved, there is extra assistance to help you and this pattern is no exception - there's a video to help with the pockets.
The pattern was perfect for a l'oiseau fabrics remnant I'd been sitting on for some time.  This unique border print was only 52 cm long and the only thing I'd been able to think of before was a gathered skirt - but that wouldn't show off the Amsterdam street scene.  Hooray for the Trendy Tunic which was exactly right to display the border!  And I had scraps of the perfect turquoise cotton/spandex for the accent pieces.

But I'd like to share something I've learned to help make that seam matching go a little easier!  I have struggled with matching seams in the past - my serger wants to push the top piece of fabric past the bottom fabric.
So now what I do is match those seams and put a pin in right away.  I run a basting stitch in just that portion of the seam on the 3/8" seam line.
Then I take it to the serger and serge as usual.
The seam is perfect!  And just what you need when you have a super pattern like the Trendy Tunic which has seam matching for the shoulders and the sides.
So now my granddaughter has a couple of new Trendy Tunics and I have plans for more!  If you already have the pattern, you can download the updated version from your account on the Love Notions website.  If you don't already have this pattern, you can get it through my affiliate link below.

Love Notions Trendy Tunic for Girls sizes 2T - 16