Friday, 12 February 2021

Prisma becomes Rosie!


Pattern - Love Notions Prisma for girls
Skill Level - Confident Beginner
Fabric - cotton/spandex from l'oiseau fabrics
Skills - colour blocking, stripe matching


My friend's granddaughter is a voracious reader (actually "listener"!) and has an amazing imagination - you never know who she actually is from day to day.  Her mother told me that she's enjoying the series about Rosie Revere the Engineer and asked if I could make her a Rosie dress for her upcoming birthday.


As I was not familiar with that reading series, her mother sent me a picture and right away I could see that Love Notions' Prisma would be absolutely perfect!  And since mother was taking care of the head scarf, all I needed was white, black and red knit fabric.

Rosie's dress is very plain with black trim at the neck and sleeves but with alternate black and red stripes at the bottom of the dress.  Now that part would need planning!
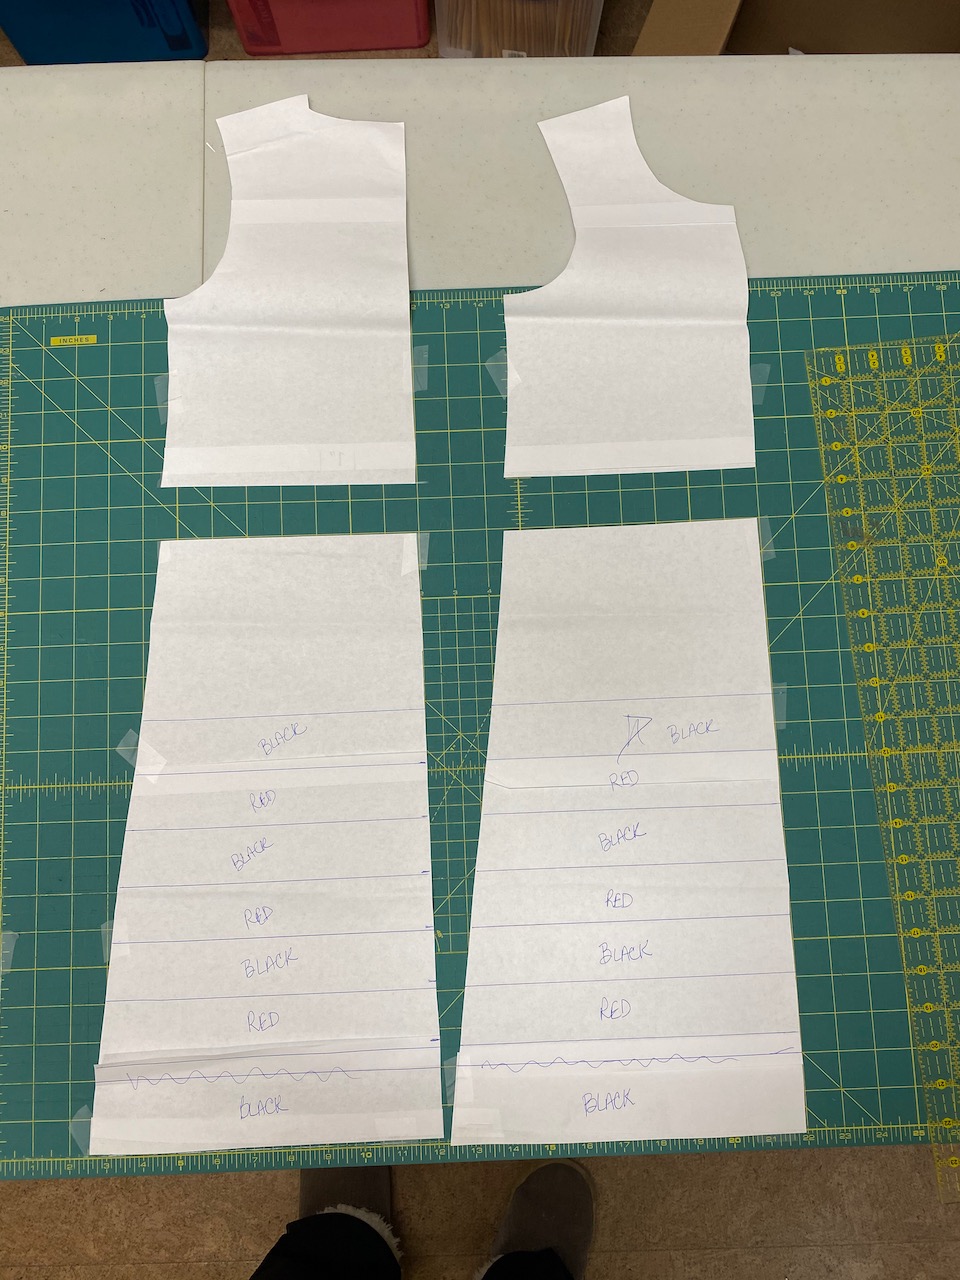

I decided on 1" stripes joined with .25" seams so each stripe would be 1.5" wide.  The bottom black stripe would be 2" wide to account for the hem.  And then I would have to add 1.5" to the body above the stripes to account for the loss that the seams cause.  I taped the pattern pieces to my cutting mat and drew lines for the stripes, then cut for the addition to the body.  I was careful to write the colour on each stripe.


I also marked the stripes with numbers and F and B for front and back.  The Prisma version I was sewing is the A-line view, so all of the stripes would be different lengths and the outsides would have a slight slant to them.  I also made the hem straight instead of the slight curve to simplify things.


Then I placed all the pattern pieces with their fabrics.
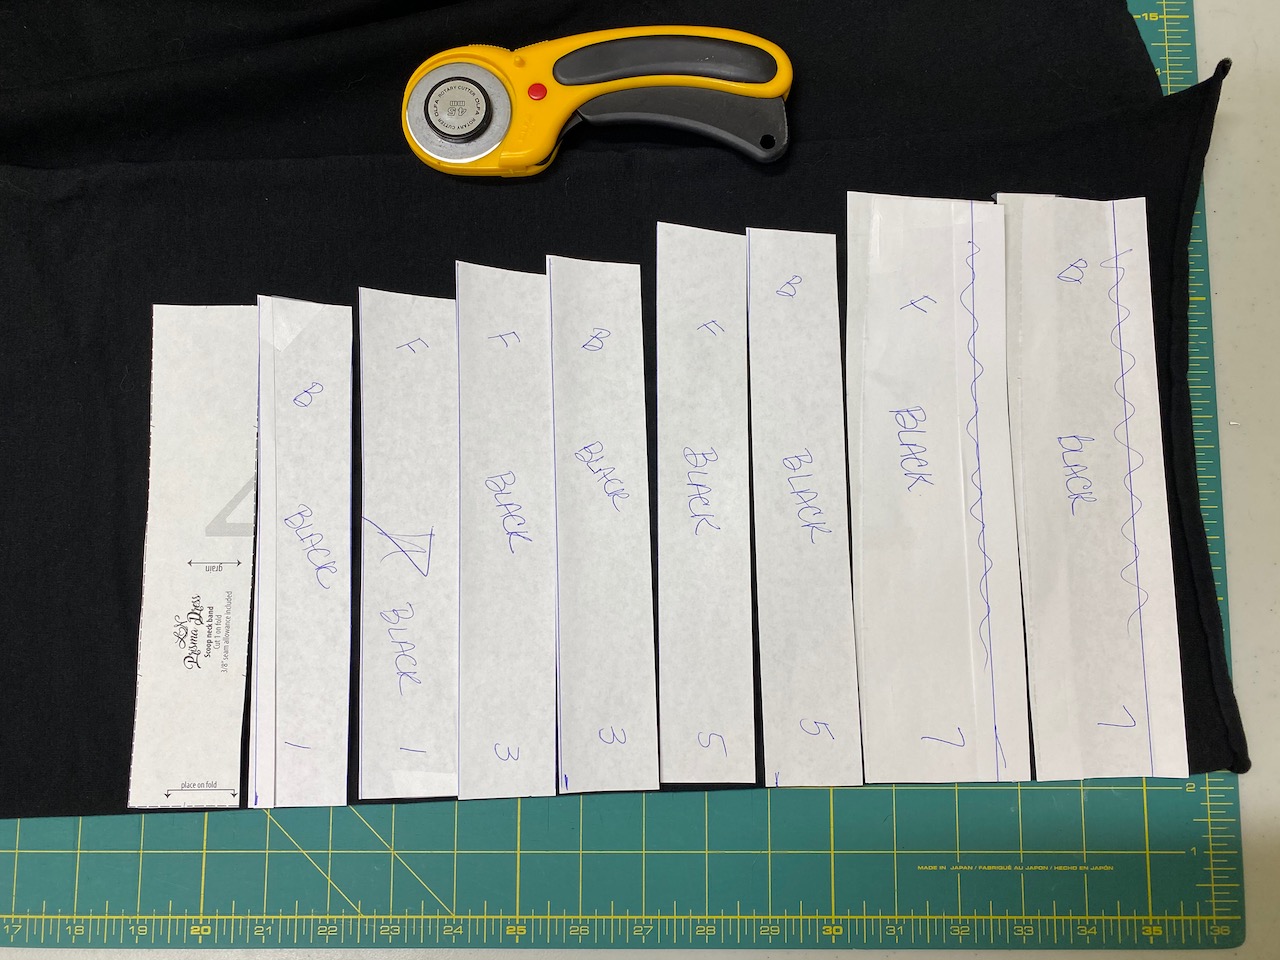

Time to cut everything out.  The stripes were easy to cut - one at a time, starting with the largest and using the straight side of the previous cut for the next one.


Once everything was cut out, I placed all the pieces in their respective task.


I started with the stripes, going from bottom up and now you can see why numbers were important!  I serged the stripes together with a .25" seam.  And as I serged on each stripe, I steam pressed the seam down.


It's easy to get confused when sewing the stripes together (ask me how I know!) so here's a tip.  You are sewing the long side of the shorter strip to the short side of the longer strip.  When you do that, you should see a triangle of the stripe on the under side.


With all the stripes serged together, then they were serged to the body.  Now it was time to assemble the dress.


Front sewn to back and sleeves in place, the side seam needs to be sewn.  This is the tricky part!  I carefully pinned front to back and then with a longer stitch, sewed the striped section together with my sewing machine to make sure the stripes stayed put.

I did the rest of the assembly with my serger, but when I got to the striped section, I made sure the serging line was just outside of the straight stitching line.


A steam press and we're ready for the final bits - neckband, bands for the ends of the short sleeves and hemming.
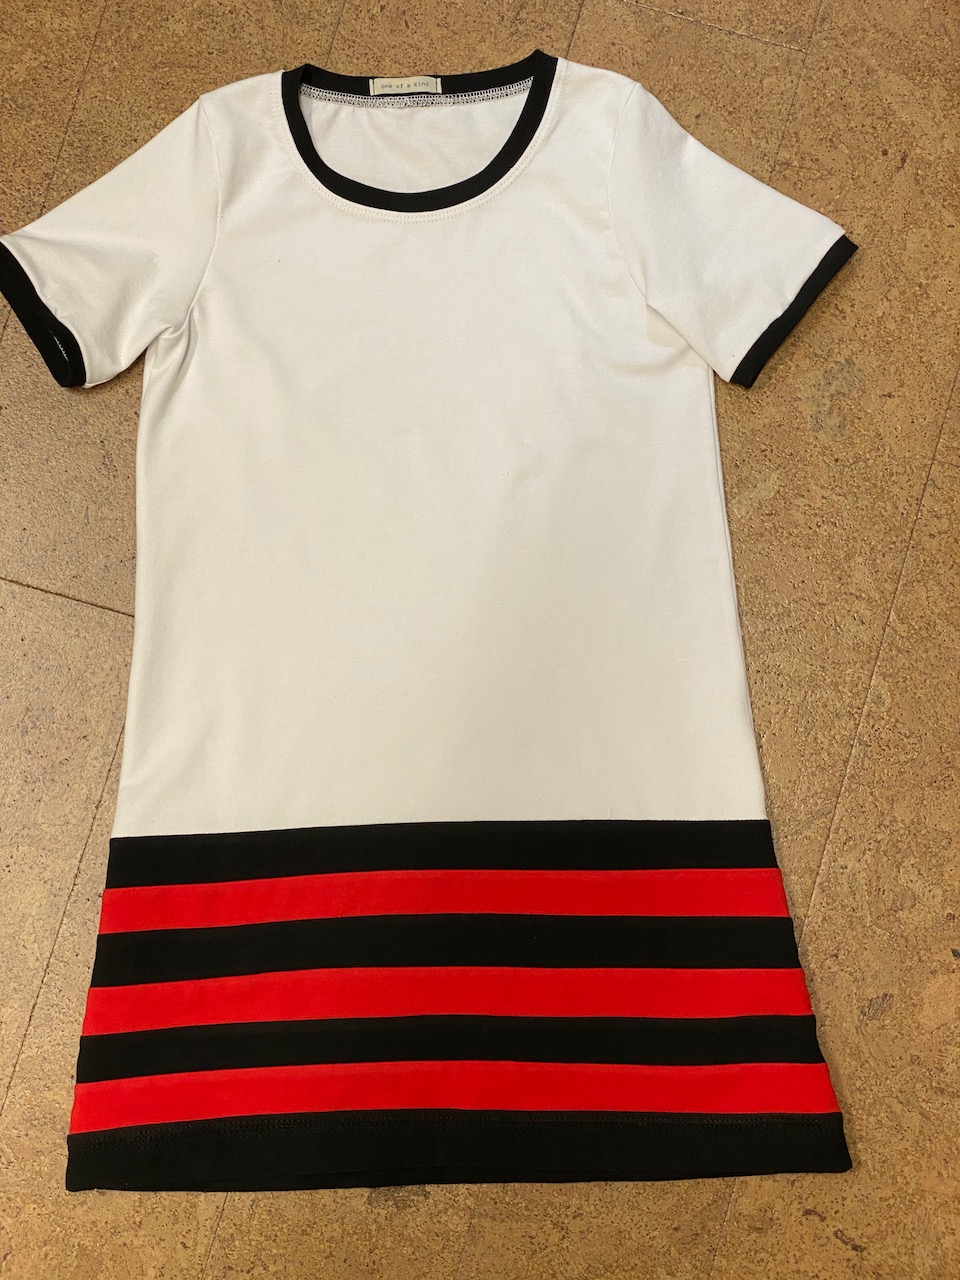

I'm pretty pleased with how well it turned out and I hope "Rosie" likes it too!  Since it's a birthday present, I don't have a modelled photo, but if I get one, I'll update this post.


One final touch - a label which I purchased from Love Notions - which seemed totally appropriate!

If you don't already have this wonderful pattern for girls, you can get it from my affiliate link below.

Love Notions Prisma Dress sizes 2T to 16


Friday, 1 January 2021

Me Made - and its not even May!


 This morning as I went to the closet to get dressed, I came to the sudden realization that nearly everything in it has been made by me!  Furthermore, nearly everything there is a Love Notions pattern!  Love Notions patterns are well designed and come with easy to follow instructions which often include videos.  All women's patterns are either now made with inclusive sizing from XS to 5X or will be in the near future and most include full bust pattern pieces.  And the support in their Facebook Group is excellent.  Are you a projector user?  If you come across a pattern without a projector file, Tami will make one up in no time at all!

So what are my favourite Love Notions patterns?  Well, let's start with my current favourite:

The Compose Robe


I had been hoping that Tami would come up with a robe pattern, and this year she did!  I am loving this pattern so much, and of course, I'm wearing it every day.  I made my Compose Robe with cuddly soft bamboo fleece from Discovery Fabrics in a rich bluey-green called Peacock.  I made my robe with the band finish, but also made robes for my grandkids with hoods.  It was a quick, easy pattern and the results have been perfect.  It's the robe I've always been wanting!

Which top do I wear most frequently?  That has to be:

The Sloane Sweater


Now that the cold weather is here, I seem to be living in my Sloanes and other than the free Laundry Day Tee, I think it must be the one most frequently posted in Love Notions' Facebook support group.  This particular one is brushed french terry from l'oiseau fabrics.  It's just the most basic one - no yoke, no elbow patches - but it's probably the one I wear most.  Another quick, easy pattern that goes together in minutes.

The Sloane is great for casual, but how about something a bit more sophisticated? 

The Whistler Pullover and Hoodie


The first time I wore this, I was besieged with questions as to where I'd bought it - it seemed to be hard to believe that I could have made it myself!  But I did - with the assistance, of course, from a video link right in the pattern instructions that helped me understand the challenging bit!  This one is made from cotton/spandex from l'oiseau fabrics.

The Whistler and Sloane are perfect for cooler weather, but how about something that spans the seasons?

The Forte Top & Dress


The Forte has to be one of the most versatile patterns.  While most Love Notions patterns come with options to change things up, I don't think you can beat the Forte for having the most!  I don't have a properly staged picture of this one because I had to make it up in a hurry for a party a friend's little granddaughter invited me to - I was ordered to wear red which is a colour I don't normally wear.  Forte to the rescue!  Which just goes to show how quickly you can make this one up and still get great results.  It's made from Solar Stretch from Discovery Fabrics which has no curl - with the result that I didn't hem the sleeves or bottom!

These are all great patterns for knits, but what about woven fabrics?

The Rhapsody Blouse & Dress


When warm weather arrives, I practically live in my Rhapsody Blouses! The loose, flowing fit of this pattern makes it perfect for summer's heat.  I've made them in everything from cotton to linen and love them all equally!  This one was made from cotton border fabric from my local Fabricland.  The finish on the Rhapsody is particularly professional, utilizing french seams, so it's beautiful inside and out.  You can buy bias binding for the neck finish, but it was this pattern that introduced me to making my own bias binding and now I'll never buy it again - I posted about it here.  

So what's my all-time favourite top?  Definitely La Bella Donna!

La Bella Donna Top & Tunic


This dolman has got to be the simplest pattern of all to make!  You can do it with just the front and back, turning under the neck edge to hem it.  I usually finish it with a strip of fabric for a clean binding finish.  I've made this in a variety of fabrics, but right now I love bamboo for this pattern.  I've made summer ones with bamboo jersey and this one is made from bamboo terry.  I get my bamboo fabric from Discovery Fabrics.  I particularly love the cowl neck and the curved hem is flattering.  If you need something quick, easy and good looking, La Bella Donna is your pattern!

And how about bottoms?

Duet Trousers

I just realized I don't actually have a current picture of the Duets by themselves!  But they're in every picture here, because they're the only pants I wear these days!  You can make them with woven or knit, contoured waistband or yoga band and the pattern comes with a fitting workbook that is worth the price of the pattern alone.  My most-worn ones are made with Yoga Stretch from Discovery Fabrics.  They're like wearing secret PJ pants!  Yes, they're that comfortable.  

All we need now is a coat.

The Octave Coat


Love Notions made my day when they produced this pattern - it's the coat I'd been dreaming about!  I love shawl collars, and this is a perfect length for me.  Make it dressy in wool with a sleek lining for classy.  Or make it more casual as I did with Polartec Windpro Stretch from Discovery Fabrics.  My coat is warm and yet it's water repellent.  And if it needs it, I can throw it in the wash.  Surprisingly easy to sew, the instructions have 3 video links if you want help.


Love Notions practically dresses me from head to toe - and if Tami ever came up with patterns for bras, panties and socks, I'd be the first in the line!  If you don't have one of my favourite patterns, you can get it through my affiliate links in the pattern titles.  And since my closet is filled with Love Notions clothes, you can take it that I have no hesitation in recommending them!

Happy Sewing!


Tuesday, 1 December 2020

Compose Robe


Pattern - Love Notions Compose Robe
Skill Level - Confident Beginner
Fabric - Bamboo Fleece from Discovery Fabrics
Skills - pocket corners

I've been wanting a good robe pattern for a while and Love Notions has come out with a great robe pattern!  It can be knee or calf length and you have the choice of a hood or a banded edge.   Of course, the pattern for women comes with the full bust option.  Not only that - you can make the Compose Robe in knit or woven fabric!  How versatile is that?  And wait - there's a children's pattern, too!

I chose to make my calf-length robe using luscious peacock green bamboo fleece from Discovery Fabrics. The fleece is light, yet warm and oh, so cosy!  The face is smooth with a fuzzy inside.  I'll be making hooded robes for my grandchildren in this fabric, too!

There are lots of the perfect little features we've come to expect from Love Notions patterns. 


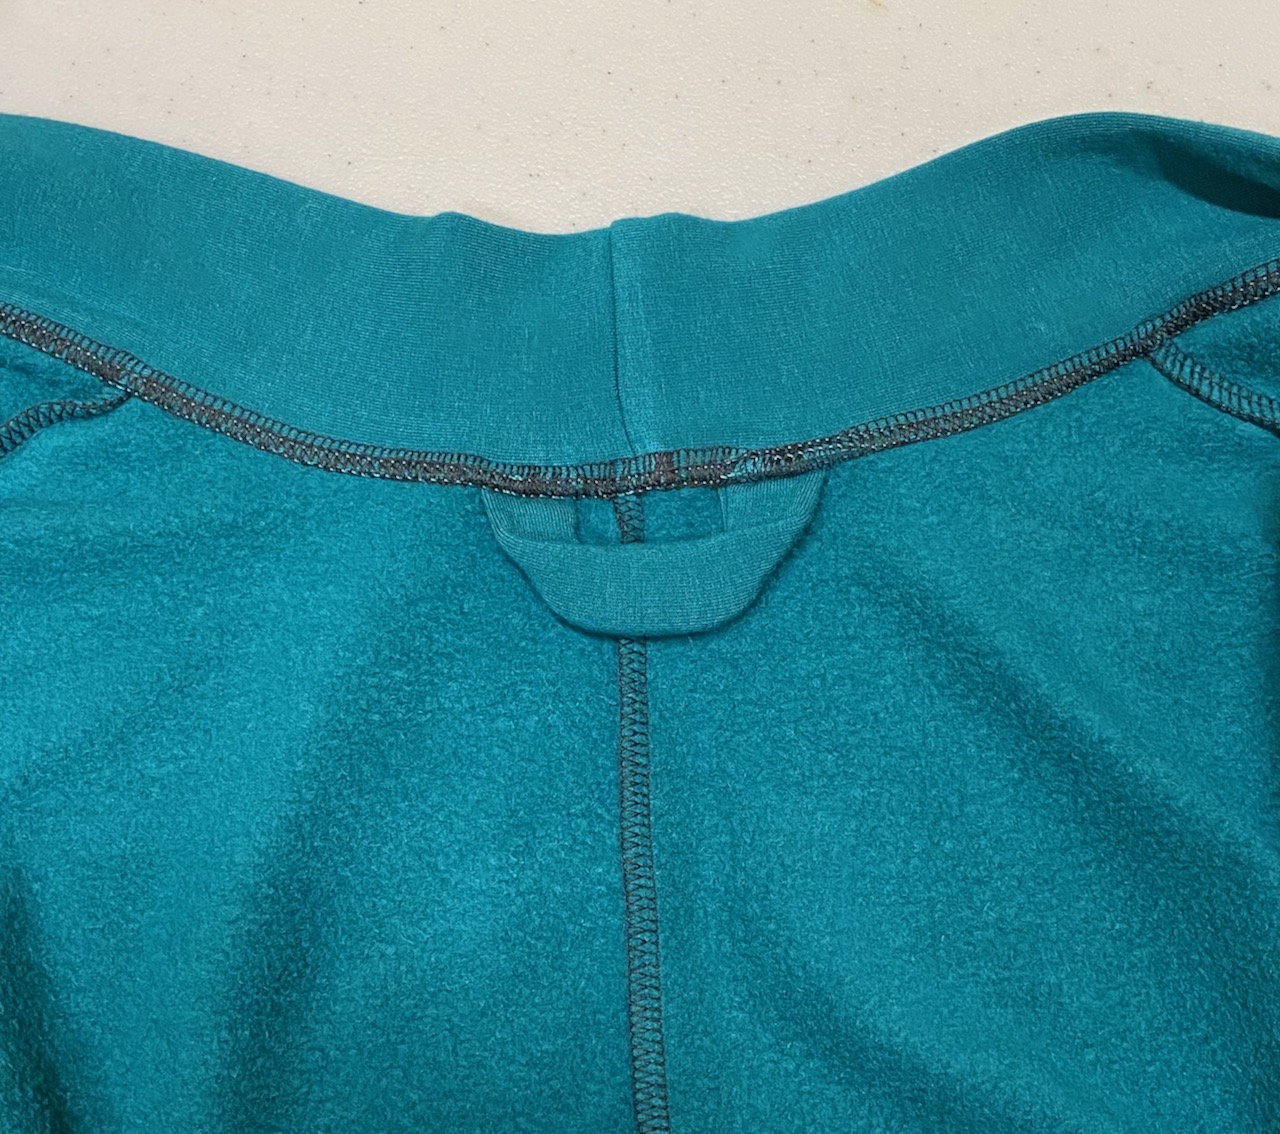
There's a loop for hanging up your robe built into the neckline.


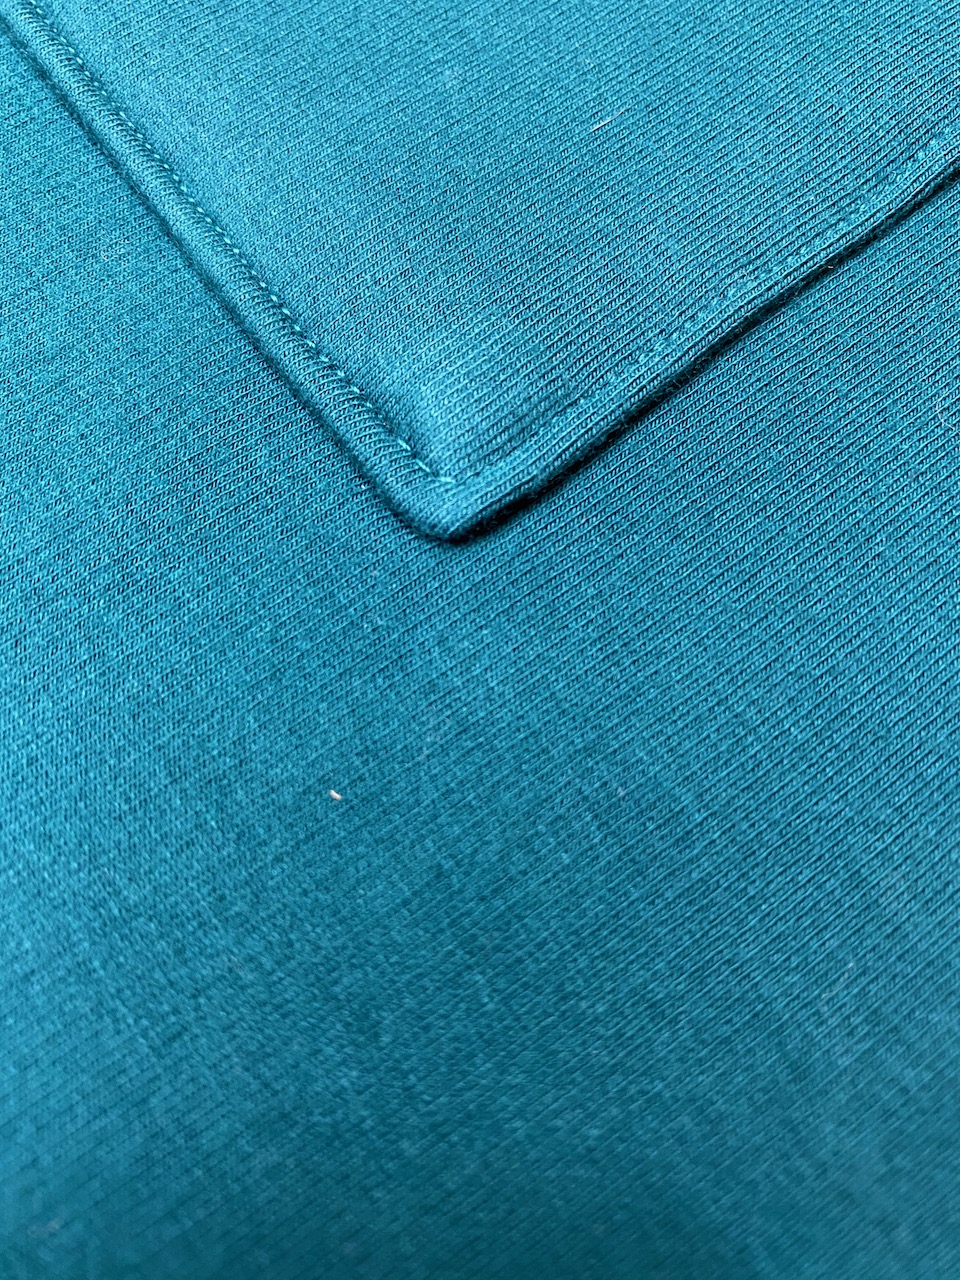
The band around the robe ends in a nice clean finish.


Loops at the waist hold the lovely, long belt above the pockets which are perfectly placed.  We need pockets, right?

Perfect Pocket Corners

And speaking of pockets, I like to see nice crisp corners on my pockets, so I've developed a process to get what I need.


After you've created the hem at the top of the pocket, press the edges in 3/8".


Now open the bottom corners and fold them in to create a diamond shape, the edges of which stay inside the pocket edges.


Steam press it flat.


And once you've stitched your pocket in place (remember to use lots of pins!) you won't see any edges peeking out at all!  Pocket perfection!

Adding Ties

Want to make sure your robe stays closed?  You can add ties and do it discretely so that they don't show.

First, put on the robe to establish where you want to add the ties - you'll want 2 sets - one near the outer edge and another at the inside edge.  I marked mine with safety pins, then put the robe on to make sure any outside stitching marks were hidden by the belt.

Then I replaced the safety pins with chalk marks for where the ties would be attached.

Next - what to use for ties.  I had an old roll of seam binding inherited from my mother-in-law's stash.  How old?  Well, you can see it's marked with 15 cents!  I cut what remained on the roll in 4, giving me ties about 8" long.  A bit longer would have been better, but I used what I had.  I cut a forked tongue in one end to prevent fraying and folded over the other end which would be stitched to the robe.  You can use a fine ribbon - or anything that's not going to be too bulky. 
I pinned the ties in place and then stitched them down.  If your robe's material is fine, you might want to reinforce under the ties.


 Now I can wear my robe with confidence knowing that it's not going to accidentally come open!

Love Notions' newest pattern, the Compose Robe is the pattern I've been waiting for.  It's comfortable, can be made in knit or woven fabric and has the clever features I've come to expect from well-made Love Notions patterns.  Available in women's and children's sizes, it's a pattern that belongs in all pattern libraries.  You can get the patterns from my affiliate links below.

Love Notions Compose Robe for Women - sizes XS - 5XL

Love Notions Compose Robe for Children - sizes 2T - 16


Monday, 19 October 2020

Breckenridge Henley


Pattern - Love Notions Breckenridge Henley
Skill Level - Confident Beginner
Fabric - Cotton/spandex French Terry and jersey from l'oiseau fabrics
Skills - pattern marking, machine sewing buttons


Love Notions' newest pattern is the Breckenridge Henley.  As always, options, options, options!  Shirt, tunic and dress lengths as well as short and long cuffed sleeves, plus a rolled tabbed long sleeve option.  

The fabric suggestions are light to medium weight kits with at least 40% stretch.  I chose to make mine with cotton/spandex French terry from l'oiseau fabrics with the cuffs and neckband in cotton/spandex jersey.  This pattern is relatively simple once you get the neckband on and of course there's a video to help you with this step.  And naturally I have a few tips for you to help make it easier!

Marking

I can't stress enough how important marking is.  Make sure you transfer all marks to your pattern pieces.  I like to use long quilting pins with coloured heads.  I always use green ones to mark the backs of sleeves and white to mark the fronts and I do the same for the armscye markings.  That way, I never risk putting a sleeve in backwards.

I did the same for the neckband


I matched the pin colours on the band and the bodice front.  There are so many marks on these pieces you can see that it makes the job so much simpler when you have a quick reference to guide you.

Sewing on Buttons by Machine

It took me a long time to get brave enough to try sewing on buttons with my sewing machine.  Now I wonder why I waited so long!  Sewing with a needle and thread always took forever and cramped my hands up.  Once I found out how easy it is, I went out and bought a special foot for my machine, but you can do it without that and I'll tell you how later.


The first thing you need to do is position your buttons.  I pinned the placket together in between where the buttons would go to keep it in place, then dabbed glue stick on the backs of the buttons and placed them on the placket.  Don't worry about the glue - it won't clog up your needle.  By the time you take it to your sewing machine, the glue will be mostly dry.

Now it's time to sew the buttons on.  My machine has a stitch for sewing on buttons, but if yours doesn't, I'll tell you how to get around that, too!

I place the buttons under the foot roughly positioned and drop the foot to hold it in place.  My buttons have 4 holes and I like to do them diagonally.  I put the needle in the left-most hole and then turn the wheel by hand to make sure it's going to slip easily into the right-most hole and when I'm sure I have the button positioned properly, I let the machine do the work.  I do each button once to hold it in place.  

After trimming the loose threads, I turn the front piece around and do the other set of holes.  Each button is now sewn in place with an X of thread.

And to seal the deal, I dab the back of the stitching with Fray Stop to make sure the buttons stay in place.

Now if you don't have a button foot or a button stitch, you can still sew buttons on with your sewing machine as long as it has a zig zag stitch.

Take the foot off your machine.  Put the button roughly in place and drop the post right on it.  You will need to adjust the position a bit.  

Now turn off your feed dogs and set your machine to zig zag.  You want the stitch length as short as you can do it - like 0.

Lower the needle almost to your button and adjust the width of the zig zag stitch so that the needle will go easily into both holes - turn the wheel by hand.

I do about 3 or 4 stitches for each set of holes.  You can tie off the threads at the back and trim them.  And this is where I like to fix them with a drop if Fray Stop.


The placket neckband and row of buttons really finished the Breckenridge Henley. I love that there's a beautiful V and it's not too low.  The sleeve lengths give me plenty of options to change the look up and I love that I can make it tunic and dress length as well as shirt length.  

You can get this pattern through my affiliate link below.


Thursday, 6 August 2020

Terra Tunic - with a cowl neck hack

Pattern - Love Notions Terra Tunic
Skill Level - Confident Beginner
Fabric - Discovery Fabrics' Bamboo Terry
Skills - Basic Pattern Hacking


The Terra Tunic was the first pattern I was privileged to help test for Love Notions and it will always have a place in my heart.  The Terra Tunic is a straight fitting top while not being too fitted.  One of the great things about this pattern is the variety of neck styles - scoop, v-neck, funnel, boat, asymmetrical and hooded.  I've sewn 4 of them and found them all an easy sew.  This time, however, I wanted to take the cowl neck from the La Bella Donna and put it on the Terra Tunic.

I had a length of beautiful bamboo terry from Discovery Fabrics that I wanted to use - a deep rich purple with a wonderful hand and lovely drape.  The soft inside will be just so cosy when cool weather comes.  Discovery Fabrics carries quality fabrics at reasonable prices and their service is always excellent.

We are often asked in the Love Notions Pattern Support group if it's possible to take a neckline or sleeve from one pattern and take it to another.  And of course, the answer is yes - and it's actually quite easy.

First I print out and tape together the pattern - but I don't trim the pattern yet.
I lay the La Bella Donna pattern on top of the Terra Tunic front and back, tracing the neckline on the pattern.  Now that I have the neckline I want, I simply use the cowl neck piece from the La Bella Donna and sew it in following the instructions for La Bella Donna.  It's a simple as that!

Serging the side seams

The Terra Tunic has a split hem with the back being a little longer than the front.  The instructions say to machine stitch the side seams - and of course that works perfectly.  I love my serger, however, and wanted to serge those side seams.  But how do you do that with a split hem?  It's not hard!
I machine stitch the area at the top of the split hem - starting a couple of inches above.
Then I serge the seam starting at the sleeve end and when I get to the machine stitched portion, I veer off sharply - I fold the seam off to the left to make this move easier.
Now to the ironing board.  Press side seams to the back and when you get to the split hem, fold back the vent pieces and give it a good steam press.  If you have a clapper, this is one of those perfect times to use it so you get the top of the vent as flat as possible.

I love my Terra Tunics.
 I've made matching mother/daughter ones for my daughter-in-law and granddaughter with the boat necks.   If you want to know how I made my granddaughter's tunic to match her mother's check this link out - Mummy & Me Terra Tunics.
I've used the asymmetrical neck for one I did a Love Notions blog post on embellishing with grommets.  If you want to know more about this one, here's a link - How to Add Grommets to a Split Hem.
And I used an amazing border print for the funnel neck Terra Tunic I made during testing.

The Terra Tunic gives you options that allow you to make comfortable, attractive tunics with neck styles that will make every shirt different and unique.  If you don't already have this pattern, you can get it through my affiliate link below.

Love Notions Terra Tunic


Thursday, 23 July 2020

La Bella Donna - More Inclusive Than Ever

Pattern - Love Notions La Bella Donna
Skill Level - Confident Beginner
Fabric - Discovery Fabrics Bamboo French Terry
Skills - Hemming, Pressing

Love Notions' popular pattern, La Bella Donna, has been re-tested and re-issued.  This super-easy and oh-so-comfortable pattern is now sized XS to 5XL.  What's more, it now has a full bust pattern piece. It comes with three sleeve options; short, three-quarters and full length.  You can make it with the scoop neck or have a hood or cowl instead.  And for finishing off?  Hem, facing or shirt band.  It comes in shirt and tunic length.  As usual, there are so many options!

The pattern calls for medium weight knit fabrics with at least 40% stretch, and I chose to make mine from Discovery Fabrics' Bamboo French Terry in a lovely periwinkle blue.  This fabric has beautiful drape and stretch and is so comfortable to wear.  Everything I've bought from Discovery Fabrics has been top quality and the service is great.
I chose to make my latest La Bella Donna with three-quarter sleeves as I'm always pushing them up anyway.  It's such a comfortable length for me.  There's a long cuff, but the seam is above my elbow - the perfect spot.  This is a very quick pattern to sew - so few pieces!  Body, optional cowl/hood, sleeve cuffs/bands - that's it!

I don't know why I haven't made a cowl neck for myself before - I just love it.  And for a person "of a certain age" it's a perfect neckline!  Made in my French Terry, it drapes beautifully.  And once I sewed the cuffs and cowl on, all that was left to do was hem the bottom - I told you this was a quick pattern!

You have a choice of a band at the hips to finish or a hem which can simply be turned under a half inch and stitched, or faced and stitched.  I decided to hem.

You know I can't review a pattern without throwing in a hint or two, and since La Bella Donna has that flattering curved hem, I thought I would show you how easy it is to hem a curved edge.
The first thing I did was to turn the hem under .5" and secure with lots of long pins.  And then you notice that the curved hem gives you lots of bulges.  Don't panic - it's easy!
This is where your steam iron comes into play - I hate ironing, but I can't sew without my steam iron. Simply press the iron on the bulges and they shrink!  And now you can see why you use long pins.
And just like magic, the bulges are flat.  And if you wind up with a tuck or two, it doesn't matter because it's on the inside of the garment.

Let's look more closely:
Before
After
After you've stitched your hem (I did mine on my coverstitch) you may notice some waviness.  Time to press again.
I turn my  iron sideways and slide it gently down the body towards the hem.  And any waviness is a thing of the past.
La Bella Donna - which is Italian for beautiful lady - is a pattern that is quick and easy to make and the result is an attractive, comfortable garment.  There are so many options that you can make it time after time and each one will be unique.  If you bought this pattern in the past, you can get the updated version in your Downloads on the Love Notions website.  If you don't have it - you need it!  You can get it from my affiliate link below.

Love Notions La Bella Donna sizes XS to 5X