Can you believe how quickly time is flying? It's almost time to start thinking about Christmas! In our family, we don't wrap presents with gift wrap anymore - we use fabric gift bags which continuously make the rounds. It's a big saving on expensive gift wrap and is good for the environment as well because you can't recycle most gift wrapping paper.
And of course, I don't just use these gift bags at Christmas. Birthday presents, baby gifts - they all get tucked into a homemade gift bag. For Christmas bags, I buy Christmassy fabric when the fabric stores put it on sale for a greatly reduced price. And I check out the sale cottons and thrift stores for all the other bags.
So let's get started! These gift bags will have channels for ties so the first thing I look for is something suitable and since I always have a good supply of homemade bias tape, I immediately checked there and found some burgundy tape that matched my fabric. You can use so many things for ties - ribbons, shoelaces, cords - the options are endless.
For your bag, you want to cut the width you need plus about 3" for side seams and ease in the bag. For the length you want the height of what you're bagging X2 plus about 5 or 6". So once the fabric is cut, you're ready to assemble.
Fold over and iron 1/4" around each edge. I just eye-balled it but you can be more precise if you want.
Then on each end, fold over and iron another 2"
Stitch along the bottom of that 2" hem. Then taking into consideration the width of your tie, stitch another line above that. Make sure that top stitching line is the same depth on each end of your bag so that the top hems match.
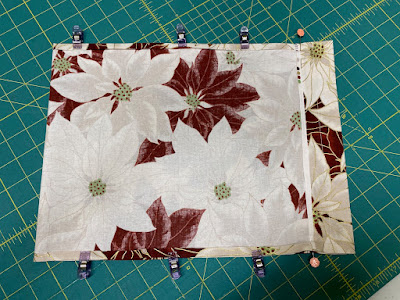
Now fold your right sides together. I clipped the sides together and put in a pin at the bottom channel stitching line which is where I will stop. Stitch the sides - about 1/8" from the edge, backstitching at each end to secure the seam. Turn the bag right side out and press it. Pressing isn't totally necessary, but it does make finishing easier and looks better, too.
Now you're ready to insert the ties in the channels. I cut mine a couple of inches longer than the width of the bag as I didn't plan on finishing with a bow. If you want to tie bows in each end, you'll want a couple more inches on that. I used a safety pin to thread my ties through.
Ties threaded - you're done! You've made a lovely gift bag that someone will be delighted to receive and think of all the good you've done for the environment. And it didn't take much more time than gift wrapping a present. The added bonus is that you're bound to get the gift bag back at some point!


No comments:
Post a Comment