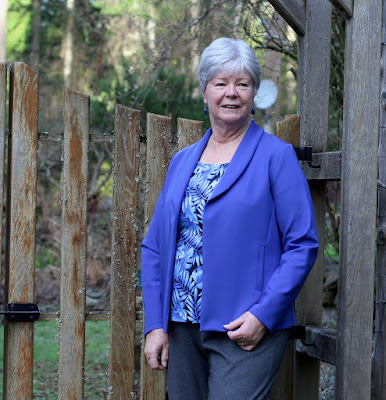
Pattern - Love Notions Metra Blazer
Skill Level - Intermediate
Fabric - Mid-Weight Scuba from Discovery Fabrics
Skills - marking wrong side, crisp corners, understitching, pressing
Of course I have to pass along some hints in my blog posts!
When it's hard to figure out which is the right side...
Discovery Fabric's Mid-Weight Scuba is amazing stuff. It's made in Italy by Borgini and is positively delicious to cut and sew. My scuba was a colour called Clematis - a lovely royal blue.
My big problem was trying to decide which was the right side since both sides looked the same to me - even under a magnifying glass! I finally decided to pick one side as the right side and mark the other side with tailor's chalk for consistency.
Since a lot of the stitchery was going to be with my sewing machine, I did some sample stitching and to my dismay, I got skips! Okay - I was using a universal needle, so I switched it with a stretch needle and all was fine.
Steam Pressing
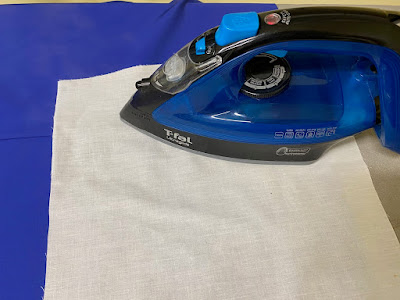
Since Discovery's solid colour Mid-Weight Scuba is 80% nylon and 20% elastane, you can't press right on the fabric. Steam pressing while you're sewing is important so using a pressing cloth and a clapper is the way to go.
First, I steam pressed over a pressing cloth. The cloth allows me to keep the iron on a little longer and really get the steam down into the fabric.
Then I quickly lift off the iron and pressing cloth, and put on the clapper. My husband made mine from maple but you can buy them. They provide a little weight and keep the steam in place, giving you a sharper finish. With a fabric like scuba, they're invaluable.
Sharp Corners
Something else I was concerned about with scuba was getting a sharp corner on the bottom of the front, but a couple of the testers taught me a clever way to get that.
Stitch right past the end - no pivoting - and then start stitching from the other side.
Then clip the corner.
Now the part that gives you the crisp corner. It's all in how you fold the seams inside. I turn the garment right side out. I fold up one seam, and then fold the other on top of the first. A tiny poke of the corner finishes the process and I have a crisp corner - as soon as I do some understitching!
Understitching
Understitching makes pressing so much easier and when you're dealing with a fabric like scuba, it is such a help! I wasn't able to get right into the corners or the back of the collar because it was produced by the burrito method, but I understitched where I could.
So what is understitching? It is attaching the seam to the inside of the garment. With the Metra Blazer, at the bottom of the front, I stitch the seam to the inside - the lining. I fold the seam away from the outside and stitch close to the seamline.
But then when you come to the collar, you have to reverse this because now the lining is showing on the outside. What understitching does is make pressing so much easier and it makes a seam lie the way you want it to. So let's take a closer look at the understitching on my Metra Blazer. You can click on any picture to make it bigger.
With the bottom corner flipped back you can see the understitching - you can't get right to the corner but you can get pretty close.
It continues up to the break for the collar.
After the break, I have to switch my understitching to the other side so that the stitching is hidden under the collar.
And when everything goes back to the way the Metra Blazer will be worn, the understitching doesn't show, but helps so much in the finish of the garment. And look at that corner! Now instead of understitching I could have topstitched, but I decided that I preferred my blazer without it.
I used their Yoga Stretch for version one and did the lining and welt in Margarita Pink so that the lining would show on the lapel of the collar and contrast with the dark grey of the rest. Just another way you can change up your Metra Blazer.
Surprisingly easy to make, the Metra Blazer is an excellent addition to any wardrobe. Shawl collar or wide collar and lovely big pockets with a professional finish, it's a blazer that you'll love to make and be proud to wear. You can get your copy through my affiliate link below.


Beautiful makes. The pressing tips are appreciated and you look wonderful in the purple-blue shade.
ReplyDeleteThank you so much!
Delete