
We live on a small island off the west coast of British Columbia and in the summer we hold markets every Saturday. Of course, in 2020 this was just not possible, but we're hoping that we will be able to hold our popular markets again this year.
I have been making and selling children's clothing at the market for a few years now. I enjoy finding fun fabrics and love to sew them up and find homes for them. It's wonderful this year to think that I can get back into it. I previously hadn't make the Sprint pattern for my stall, but it looked like an excellent summer pattern - sleeveless for cool and the option of colour blocking and a hood - which kids seem to like. So I decided to add it to my collection.
The Sprint Muscle Shirt can work for girls as well as boys and I was thinking of using a pretty floral to appeal to girls.
I had made the plain-fronted version for my grandson, but with a new selection of lovely prints from l'oiseau fabrics, I wanted to try colour blocking. The V front had me wondering how easy it would be, but as I went along, I realized a few small steps would make it easy, and I decided to document them. I used my sewing machine, serger and coverstitch in the making.
Colour Blocking the Front

I was careful to mark the exact centre of the bottom section as that will be a pivot point for my sewing machine's needle.

After stitching a couple of inches before and after the pivot point, I carefully snipped close to the stitching line.

Next, I pinned the bodice top to the bottom, pinning in the middle, then the ends and working the pins to the middle.

I then straight stitched the seam.

Since this will be for sale, I want all seams to have a finished look, and I serged the seam, then pressed it down.

You could topstitch this seam, but at this time I chose not to. Once the colour blocking was done, the rest of the top is a very quick process.
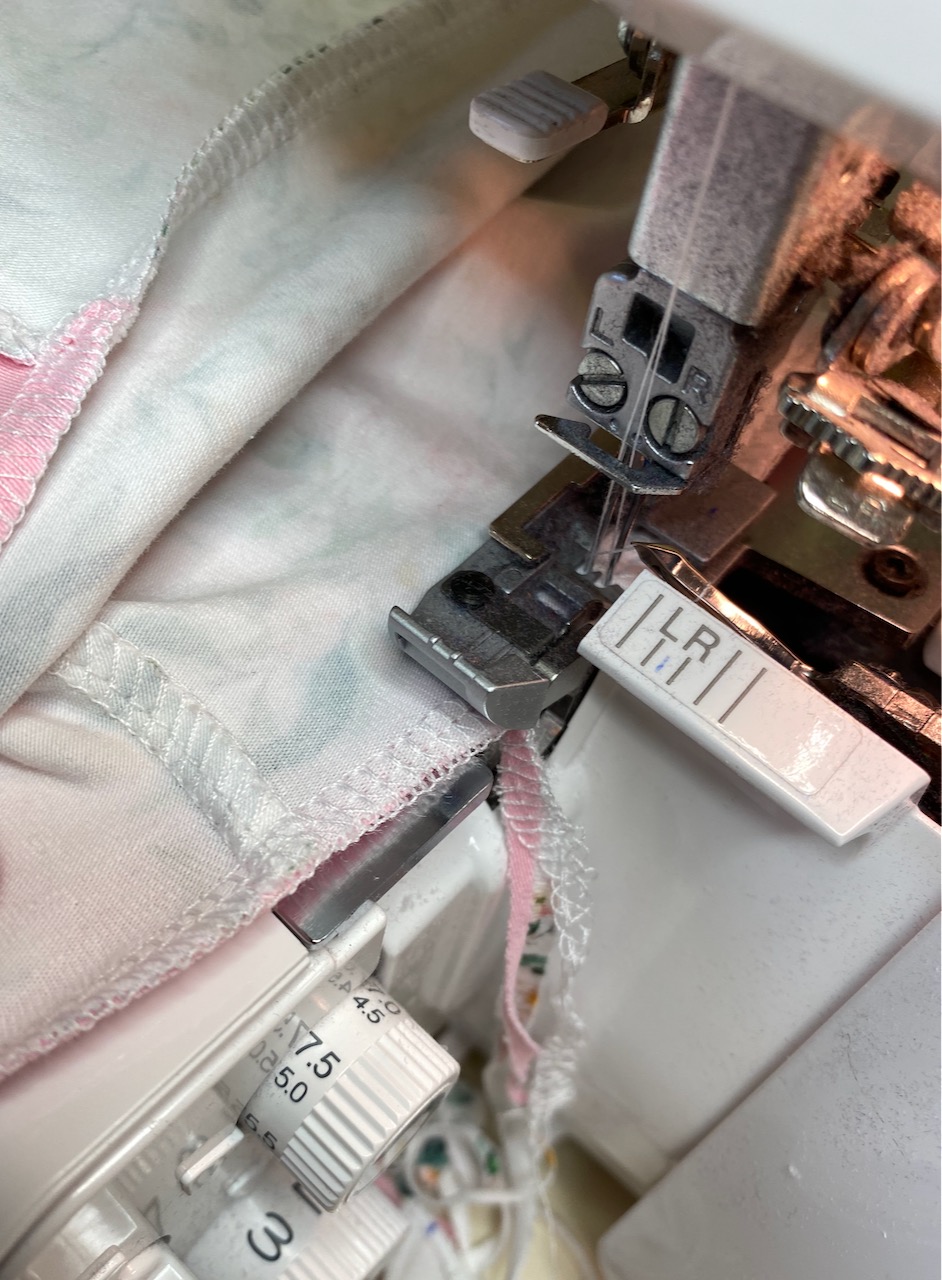
Serging in the Round
Recently I've seen some questions about how to finish off when serging in the round. There are 3 seams for this in the Sprint Muscle Shirt so I'll show you how I do it.

As I approach where I started I keep on track to trim off the excess and stay on the serging line until the excess has been cut off by the serger's blade.
I keep stitching until that excess has been severed.

Then I lock the blade off, and stitch on a further inch or so until the stitching line overlaps neatly.

Finally I lift the presser foot, angle the garment 90 degrees to the needles so that the stitching will resume off the seam, drop the presser foot again and stitch off the garment for an inch or so.

I trim right next to the seamline - this stitching will not come undone, so no need to feed the tail back into the stitching and you still have a tidy serged edge.
Coverstitching Hems
A coverstitched hem is the perfect finish for a garment you're planning on selling. So many people try to enclose the raw edge, and I think this is a mistake. When you have needles going into different thickness of fabric, you are courting tunnelling on the front side which is not a good look.

I aim to stitch close to the edge, but not over it. If I wind up with a little move over the stitching line, it's easy to trim the raw edge back for the best look. The fabric won't fray and it certainly doesn't show on the front.

Now obviously I can't show you a modelled photo because this will be going on my stall, but I'm very pleased with the finished product and I'm sure somewhere there's an 8-year old girl who will be so happy with her new sleeveless hoodie!
You can get this pattern from my affiliate link below:
Looks great Pat, as usual.
ReplyDeleteI wanted to pass along a tip for neckbands, sleevebands etc. just on the off chance you or your readers hadn't yet come across it.
Instructions for making a band almost always say to sew the seam first, then press in half (wrong sides together). That can be hard to do, especially in children's sizes. So instead, it's better to press the flat piece in half first. Then open back up and stitch the seam, and finally, fold on the already pressed line and touch up around the seam.
Can't believe I sewed for so many decades without figuring this out!
Karen
Great! Thanks for the tip - always looking for new ones to try out!
DeleteWonderful images, pics always help.
ReplyDeleteI'm glad you found it helpful!
DeleteMen’s hoodie street style is the perfect mix of comfort and urban attitude. Whether paired with cargo pants, ripped denim, or layered under a jacket, hoodies have become a go-to staple for everyday wear. The relaxed fit and bold designs make them easy to style while still keeping a strong streetwear vibe.
ReplyDelete