Sunday, 29 August 2021

Adventures in Scrap Busting


I do a lot of sewing for children and buy the quality cotton/spandex I use from l'oiseau fabrics who bring all their materials from Europe.  The patterns are so beautiful that I can't bear to throw away leftover bits.  A gorgeous digital print with foxes, chipmunks and birds on it that I purchased 5 years ago is a prime example.  I only had a couple of small pieces left - definitely not enough for much.  However, if I colour blocked with a solid - maybe I could use a bit more of it!

I chose the Love Notions Vanguard pattern in a size 2T.  It has built-in colour blocking options but I was going to have to do some creative colour blocking of my own.


I was able to do a front panel using the Vanguard's colour blocking middle piece.  But that was all I could get out of it.  The rest of the fabric bits were too narrow for even the sleeves.  I would have to add to the sides.


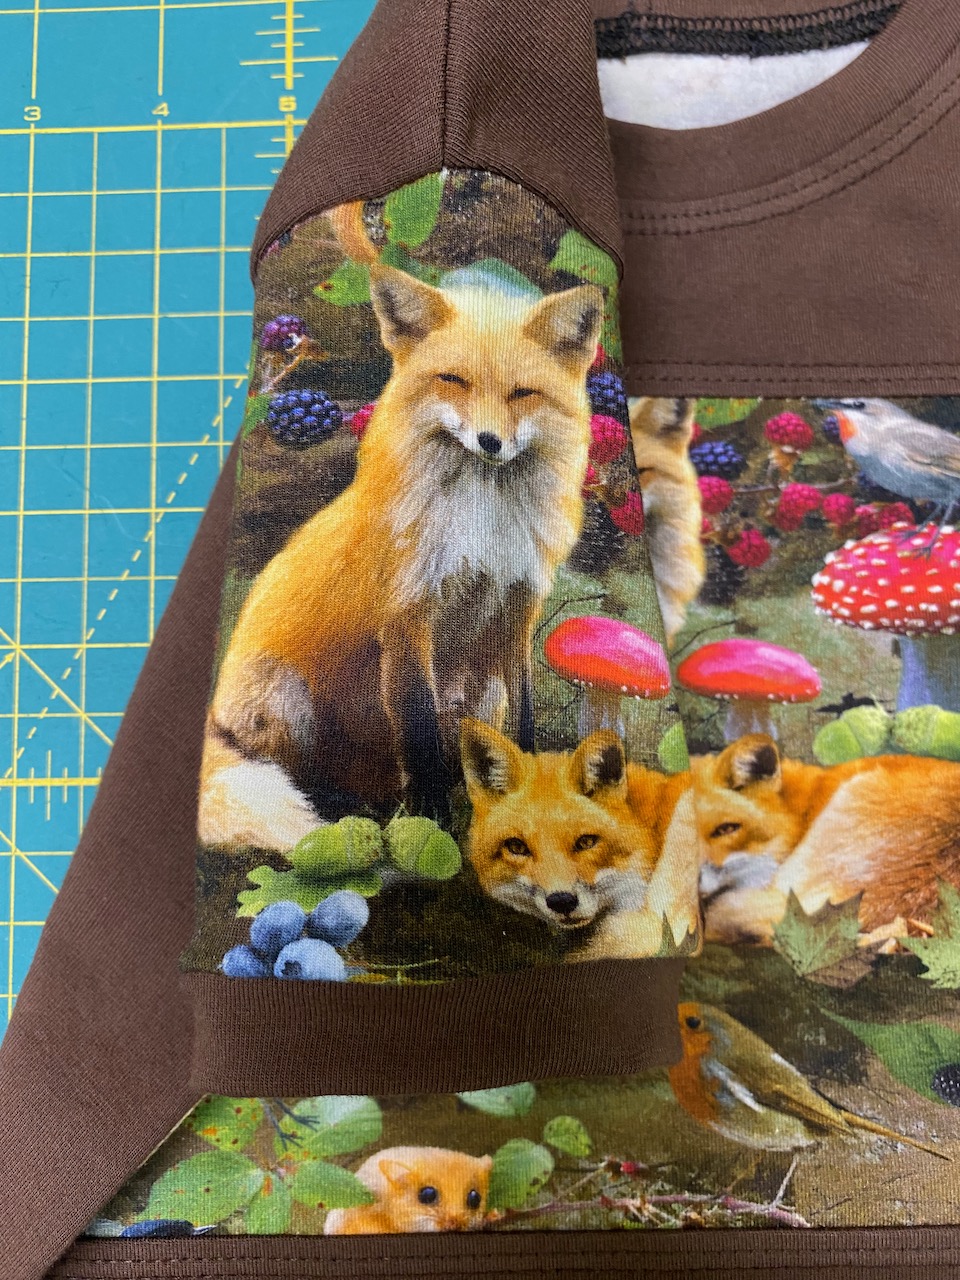
I squared off the sides of one of the long narrow strips after verifying that I could get a fox in each short sleeve.


Then I cut strips of the solid colour for either side.  I serged the strips on with 1/4" seam allowance and coverstitched the seams flat.


Now I could cut out the sleeves.  I folded the new piece in half vertically and cut out the sleeves, taking care to have the foxes in the centre.


Now I could stitch all the components of the colour blocked front together, and I coverstitched above and below the centre panel.  I wish I could have gotten one of the fox's ears in the panel, but unfortunately there wasn't enough for a 1/4" seam allowance.

All of the colour blocking out of the way, it was a simple matter to put the shirt together.  I wish I could say all of the adventures were over, but unfortunately they weren't!  I discovered that instead of cutting a back from the solid brown, I'd cut a front!  Time for some more creativity!  I managed to cut an insert to fit in and coverstitched below it.  And then I had to cut a new neckband because the opening was now wider!  However, I got it done and as for the back, that was planned, right?

So here's the shirt I managed to get from tiny pieces of a beautiful fabric.


Here's the sleeves.

and


And finally the back on which I did some more colour blocking - so that I didn't have to bin the whole project.  

I'm pretty happy with the outcome.  This reinforces my belief that even the smallest scraps can have a use and reminds me to be more careful with my pattern pieces!


Thursday, 6 May 2021

A Gardening Apron


It seems whenever I'm out working in the garden, I haven't got everything with me that I need.  What I should really have is a proper gardening apron - and hey - I can sew - so why don't I make my own!

I spent some time on the Internet looking at gardening aprons to come up with something that would work for me.  I wanted an apron that wasn't too long so that it drooped in the way when I was bending down.  It had to have a number of pockets at the bottom and a pocket in the bib - oh, yes - I wanted a bib apron.  It needed to be relatively simple and should be made with fabrics and items I already hand on hand.  And this is what I came up with!

This apron has 4 pockets at the bottom - 6 if you count narrow pockets you could slide a pencil into!  There's a wide pocket in the bib which would be good for holding seed packets.  It has waist ties and an adjustable neck strap that knots to just the right length through a grommet.  I have heavy bottom-weight woven fabric on hand and I figured I wouldn't need much more than a metre.  So let's get started!


I planned out my pieces and cut them from a tan denim-like fabric that I had sitting on the shelf.  The apron body is cut on the fold - everything else will fit in wherever it can on my fabric.  I can even fit in a 12" square in to make my own bias tape.

So what else do you need?  A 25 mm bias tape maker will make the 1/2" tape I need plus a grommet to run the neck tie through.  Or you can buy a package of wide bias tape.   My sewing machine and serger will be put into use, although you could do the whole thing with just a sewing machine.  And of course, a steam iron.

Let's get started!

I cut out all the pieces I needed from my heavy fabric. 


The body of the apron came from a 22x10.5 piece cut on the fold.  In pencil, I drew the cutout, starting at 5" from the centre at the top and curving down to 12" from the bottom at the side.  I cut it out with my rotary blade.


The rest of the pieces I fitted in from what remained of the fabric.  

Bias Binding

Make the bias binding from the 12" square - and here's a link to a blog post I did on how to make your own bias binding.  This will be used to bind the raw bib edges and the remainder will be the neck strap.  


For a 25mm bias tape maker, cut the strips 2" wide or buy a package of wide double fold bias tape.

Bib Pocket

Serge/finish the raw top edge.


Fold over 1" to the right side and stitch the sides down.  Clip the corners.


Turn the pocket right side out.  Fold the sides and bottom over 3/8" and press down.  If you want to learn how to get crisp bottom corners, I have a link for that, too!

Topstitch the top edge.

Bottom Pocket

Serge/finish the raw top edge.  


Fold over 1" to the back and stitch down.

Pin the pocket right side to the wrong side of the apron at the bottom and serge/stitch a 1/4" seam.

Press the seam towards the apron.  This makes it easier to flip the pocket to the right side without the seam at the bottom showing.

Now turn the bottom pocket up onto the front of the apron and press.


Decide where you want your dividers and draw the lines with tailor's chalk or a washable sewing marker and pin the lines in place.  Stitch the divider lines, remembering to back-stitch at the beginning and end of each line.  Pin the pockets at the sides for now.

Bias Tape for the Bib Sides

Open one side of the bias tape and pin the right side of the tape to the wrong side of the apron bib.  


Stitch on the fold crease.


Now flip the binding to the right side of the apron and stitch close to the edge.


Serge/finish the raw edges at the top and sides.  Turn the bib top and sides to the back 1", press and stitch down.  Attach the bib pocket - I sewed mine in place 2" from the top of the apron.

Ties

Fold the ties in half lengthwise and serge/stitch 1/4" seam down the sides and across one end.  Turn right side out and press.


Fold the raw edge of each tie under 3/4" and pin on the back at the top of the sides - stitch down.

Stitch the remaining bias tape down one side through the entire length.  

Attach one end to a top corner of the bib at the back.

Apply the grommet to the other corner.  Thread the neck strap through the grommet.  Try on the apron and tie a knot in the neck strap so the apron sits at the right height for you.

And that's it!  You now have a gardening apron - probably made from a piece of heavy woven fabric that was too small to make anything else with!


Friday, 19 March 2021

"Sprinting" to the Summer Market!


We live on a small island off the west coast of British Columbia and in the summer we hold markets every Saturday.  Of course, in 2020 this was just not possible, but we're hoping that we will be able to hold our popular markets again this year.

I have been making and selling children's clothing at the market for a few years now.  I enjoy finding fun fabrics and love to sew them up and find homes for them.  It's wonderful this year to think that I can get back into it.  I previously hadn't make the Sprint pattern for my stall, but it looked like an excellent summer pattern - sleeveless for cool and the option of colour blocking and a hood - which kids seem to like.  So I decided to add it to my collection.

The Sprint Muscle Shirt can work for girls as well as boys and I was thinking of using a pretty floral to appeal to girls.

I had made the plain-fronted version for my grandson, but with a new selection of lovely prints from l'oiseau fabrics, I wanted to try colour blocking.  The V front had me wondering how easy it would be, but as I went along, I realized a few small steps would make it easy, and I decided to document them.  I used my sewing machine, serger and coverstitch in the making.

Colour Blocking the Front


I was careful to mark the exact centre of the bottom section as that will be a pivot point for my sewing machine's needle.


After stitching a couple of inches before and after the pivot point, I carefully snipped close to the stitching line.


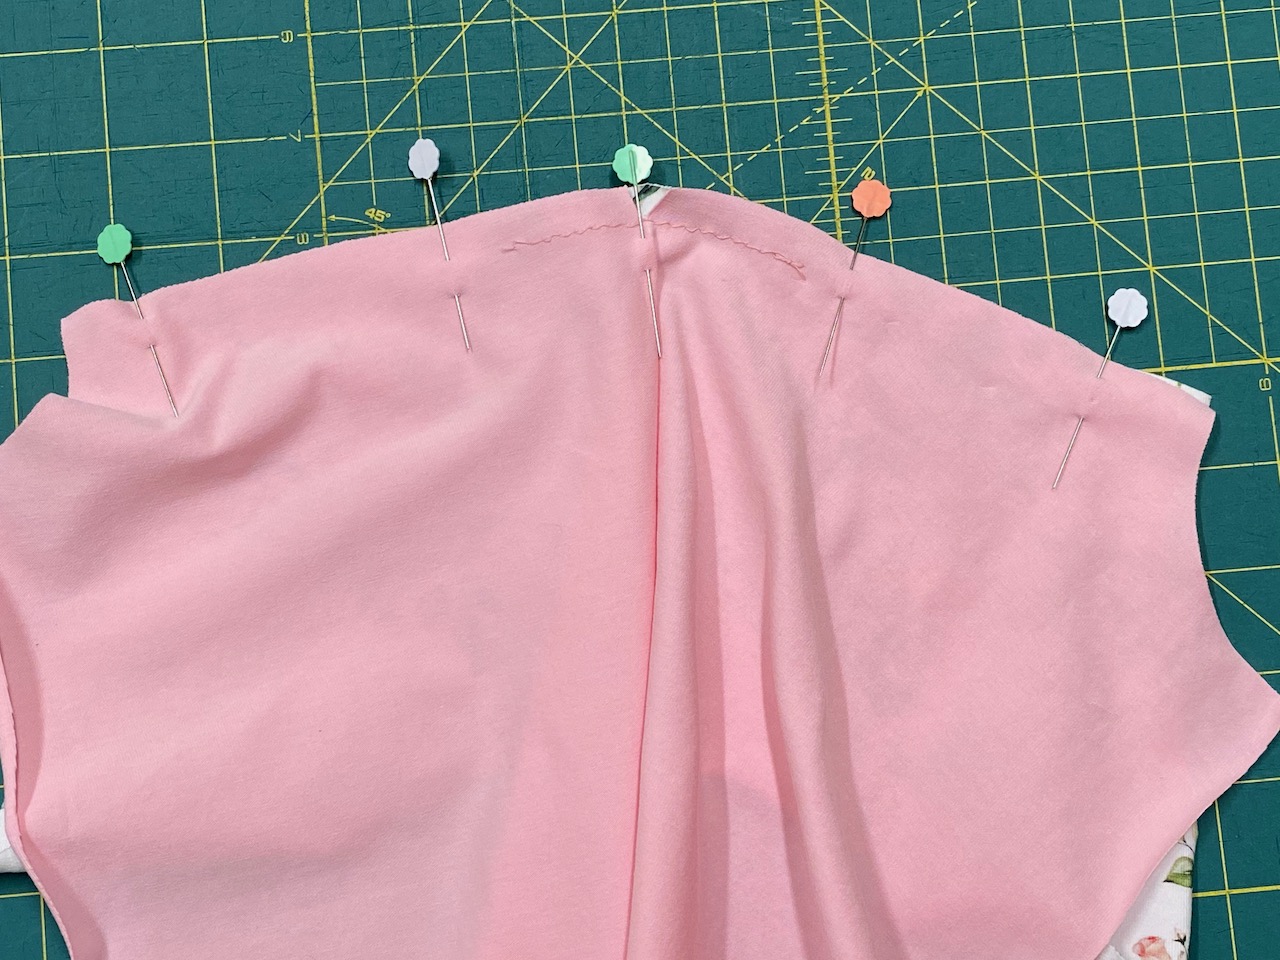
Next, I pinned the bodice top to the bottom, pinning in the middle, then the ends and working the pins to the middle.


I then straight stitched the seam.


Since this will be for sale, I want all seams to have a finished look, and I serged the seam, then pressed it down.  


You could topstitch this seam, but at this time I chose not to.  Once the colour blocking was done, the rest of the top is a very quick process.

Serging in the Round

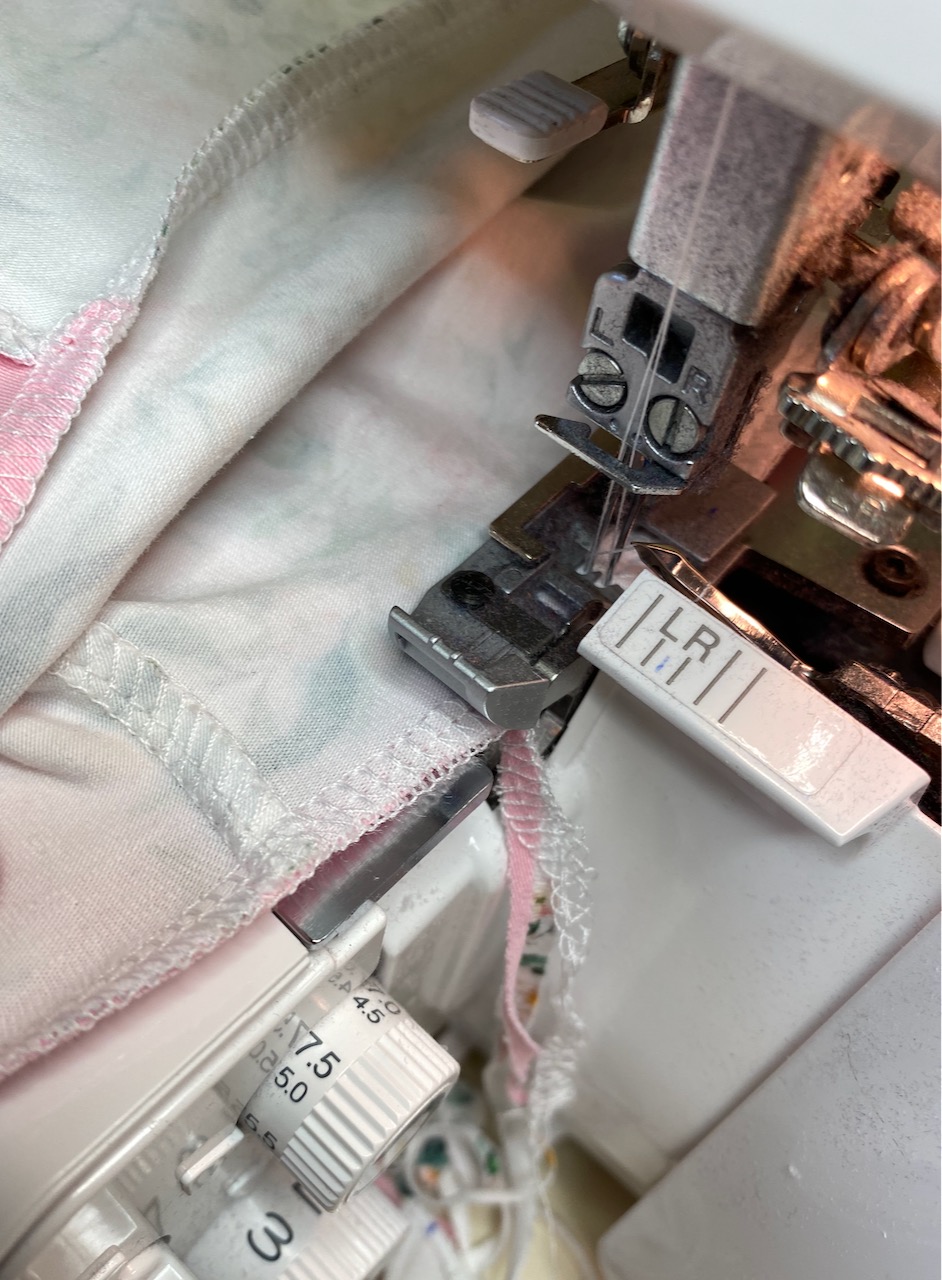
Recently I've seen some questions about how to finish off when serging in the round.  There are 3 seams for this in the Sprint Muscle Shirt so I'll show you how I do it.


As I approach where I started I keep on track to trim off the excess and stay on the serging line until the excess has been cut off by the serger's blade.


I keep stitching until that excess has been severed.


Then I lock the blade off, and stitch on a further inch or so until the stitching line overlaps neatly.


Finally I lift the presser foot, angle the garment 90 degrees to the needles so that the stitching will resume off the seam, drop the presser foot again and stitch off the garment for an inch or so.  

I trim right next to the seamline - this stitching will not come undone, so no need to feed the tail back into the stitching and you still have a tidy serged edge.

Coverstitching Hems

A coverstitched hem is the perfect finish for a garment you're planning on selling.  So many people try to enclose the raw edge, and I think this is a mistake.  When you have needles going into different thickness of fabric, you are courting tunnelling on the front side which is not a good look.


I aim to stitch close to the edge, but not over it.  If I wind up with a little move over the stitching line, it's easy to trim the raw edge back for the best look.  The fabric won't fray and it certainly doesn't show on the front.


Now obviously I can't show you a modelled photo because this will be going on my stall, but I'm very pleased with the finished product and I'm sure somewhere there's an 8-year old girl who will be so happy with her new sleeveless hoodie!

You can get this pattern from my affiliate link below:

Love Notions Sprint Muscle Shirt - sizes 2T - 14


Wednesday, 24 February 2021

The New Metra Blazer in Scuba!


Pattern - Love Notions Metra Blazer
Skill Level - Intermediate
Fabric - Mid-Weight Scuba from Discovery Fabrics
Skills - marking wrong side, crisp corners, understitching, pressing


The new Metra Blazer from Love Notions looks challenging but it's surprisingly easy.  As usual, there are videos to help you.  Two collar choices offer a shawl collar and a stylish wide one.  The star of the show is the roomy pocket with its clever welt finish - who knew a welt pocket could be so easy!  And the burrito roll method gives you a lovely clean inside front.  It comes with a full bust option for those with a difference of 4" or more between high and full bust measurements and sizes XS to 5X.  What more could you want!

Of course I have to pass along some hints in my blog posts!

When it's hard to figure out which is the right side...

Discovery Fabric's Mid-Weight Scuba is amazing stuff.  It's made in Italy by Borgini and is positively delicious to cut and sew.  My scuba was a colour called Clematis - a lovely royal blue.


My big problem was trying to decide which was the right side since both sides looked the same to me - even under a magnifying glass!  I finally decided to pick one side as the right side and mark the other side with tailor's chalk for consistency.  

Since a lot of the stitchery was going to be with my sewing machine, I did some sample stitching and to my dismay, I got skips!  Okay - I was using a universal needle, so I switched it with a stretch needle and all was fine.

Steam Pressing

Since Discovery's solid colour Mid-Weight Scuba is 80% nylon and 20% elastane, you can't press right on the fabric.  Steam pressing while you're sewing is important so using a pressing cloth and a clapper is the way to go.


First, I steam pressed over a pressing cloth.  The cloth allows me to keep the iron on a little longer and really get the steam down into the fabric.


Then I quickly lift off the iron and pressing cloth, and put on the clapper.  My husband made mine from maple but you can buy them.  They provide a little weight and keep the steam in place, giving you a sharper finish.  With a fabric like scuba, they're invaluable.

Sharp Corners

Something else I was concerned about with scuba was getting a sharp corner on the bottom of the front, but a couple of the testers taught me a clever way to get that.


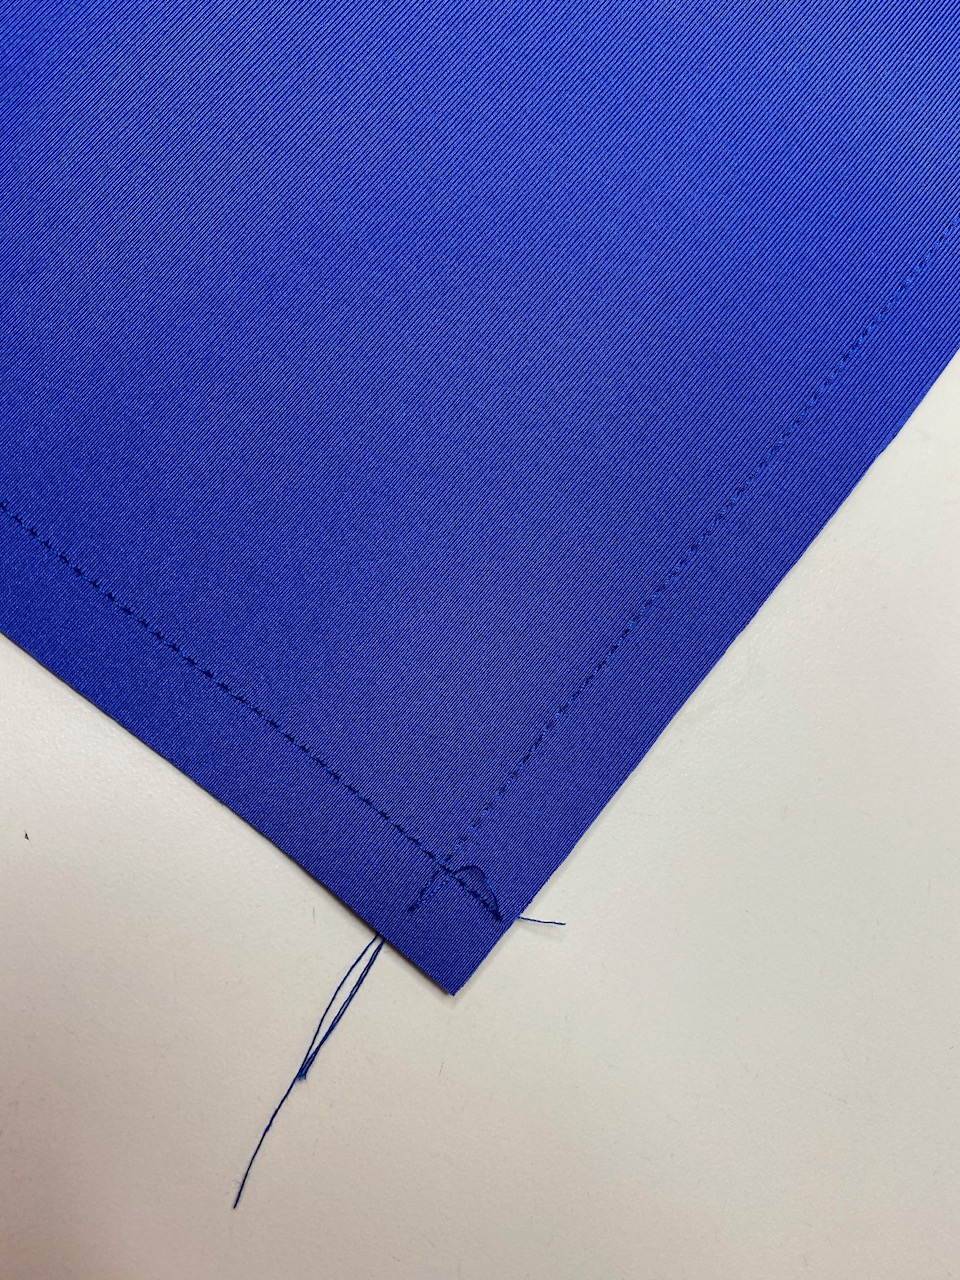
Stitch right past the end - no pivoting - and then start stitching from the other side.


Then clip the corner.


Now the part that gives you the crisp corner.  It's all in how you fold the seams inside.  I turn the garment right side out.  I fold up one seam, and then fold the other on top of the first.  A tiny poke of the corner finishes the process and I have a crisp corner - as soon as I do some understitching!

Understitching

Understitching makes pressing so much easier and when you're dealing with a fabric like scuba, it is such a help!   I wasn't able to get right into the corners or the back of the collar because it was produced by the burrito method, but I understitched where I could.


So what is understitching?  It is attaching the seam to the inside of the garment.  With the Metra Blazer, at the bottom of the front, I stitch the seam to the inside - the lining.  I fold the seam away from the outside and stitch close to the seamline.  

But then when you come to the collar, you have to reverse this because now the lining is showing on the outside.    What understitching does is make pressing so much easier and it makes a seam lie the way you want it to.  So let's take a closer look at the understitching on my Metra Blazer.  You can click on any picture to make it bigger.


With the bottom corner flipped back you can see the understitching - you can't get right to the corner but you can get pretty close.


It continues up to the break for the collar. 


After the break, I have to switch my understitching to the other side so that the stitching is hidden under the collar.


And when everything goes back to the way the Metra Blazer will be worn, the understitching doesn't show, but helps so much in the finish of the garment.  And look at that corner! Now instead of understitching I could have topstitched, but I decided that I preferred my blazer without it.

When I helped test the Metra Blazer, my first version was also made with fabric from Discovery Fabrics.

I used their Yoga Stretch for version one and did the lining and welt in Margarita Pink so that the lining would show on the lapel of the collar and contrast with the dark grey of the rest.  Just another way you can change up your Metra Blazer.

Surprisingly easy to make, the Metra Blazer is an excellent addition to any wardrobe.  Shawl collar or wide collar and lovely big pockets with a professional finish, it's a blazer that you'll love to make and be proud to wear.  You can get your copy through my affiliate link below.

Love Notions Metra Blazer sizes XS to 5X